If you like pound cake and lemon, nothing better than this cake. Easy to make and the olive oil adds a nice flavor and density to the cake….
Desserts
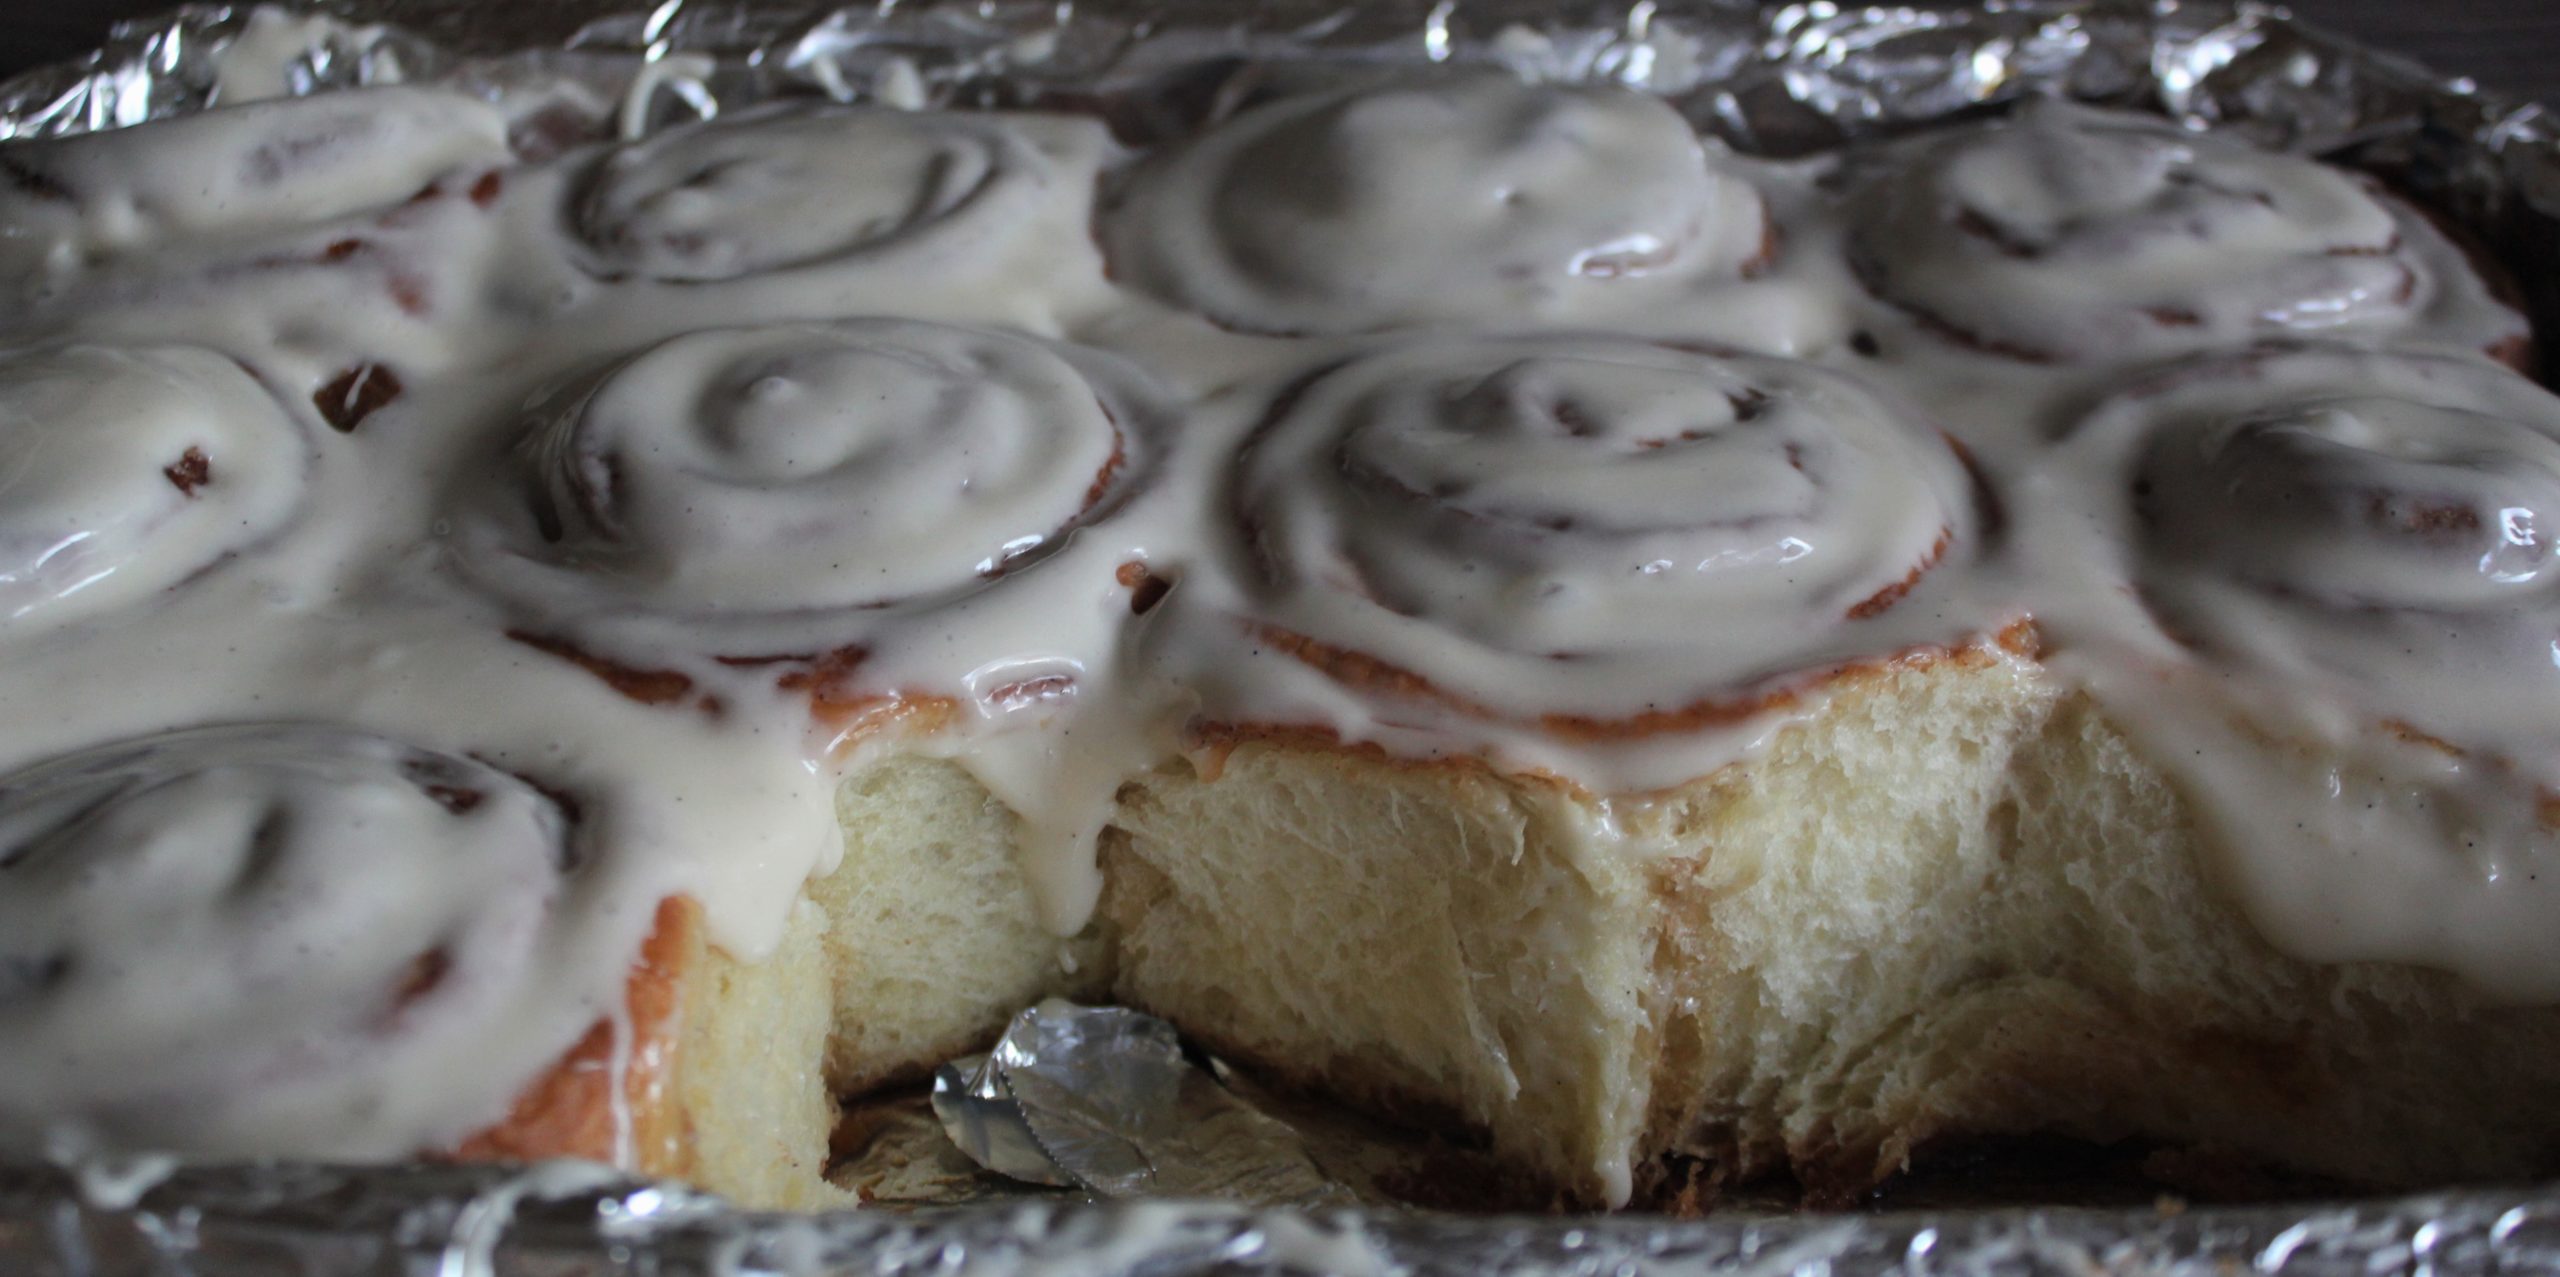
Light & Moist Cinnamon Rolls
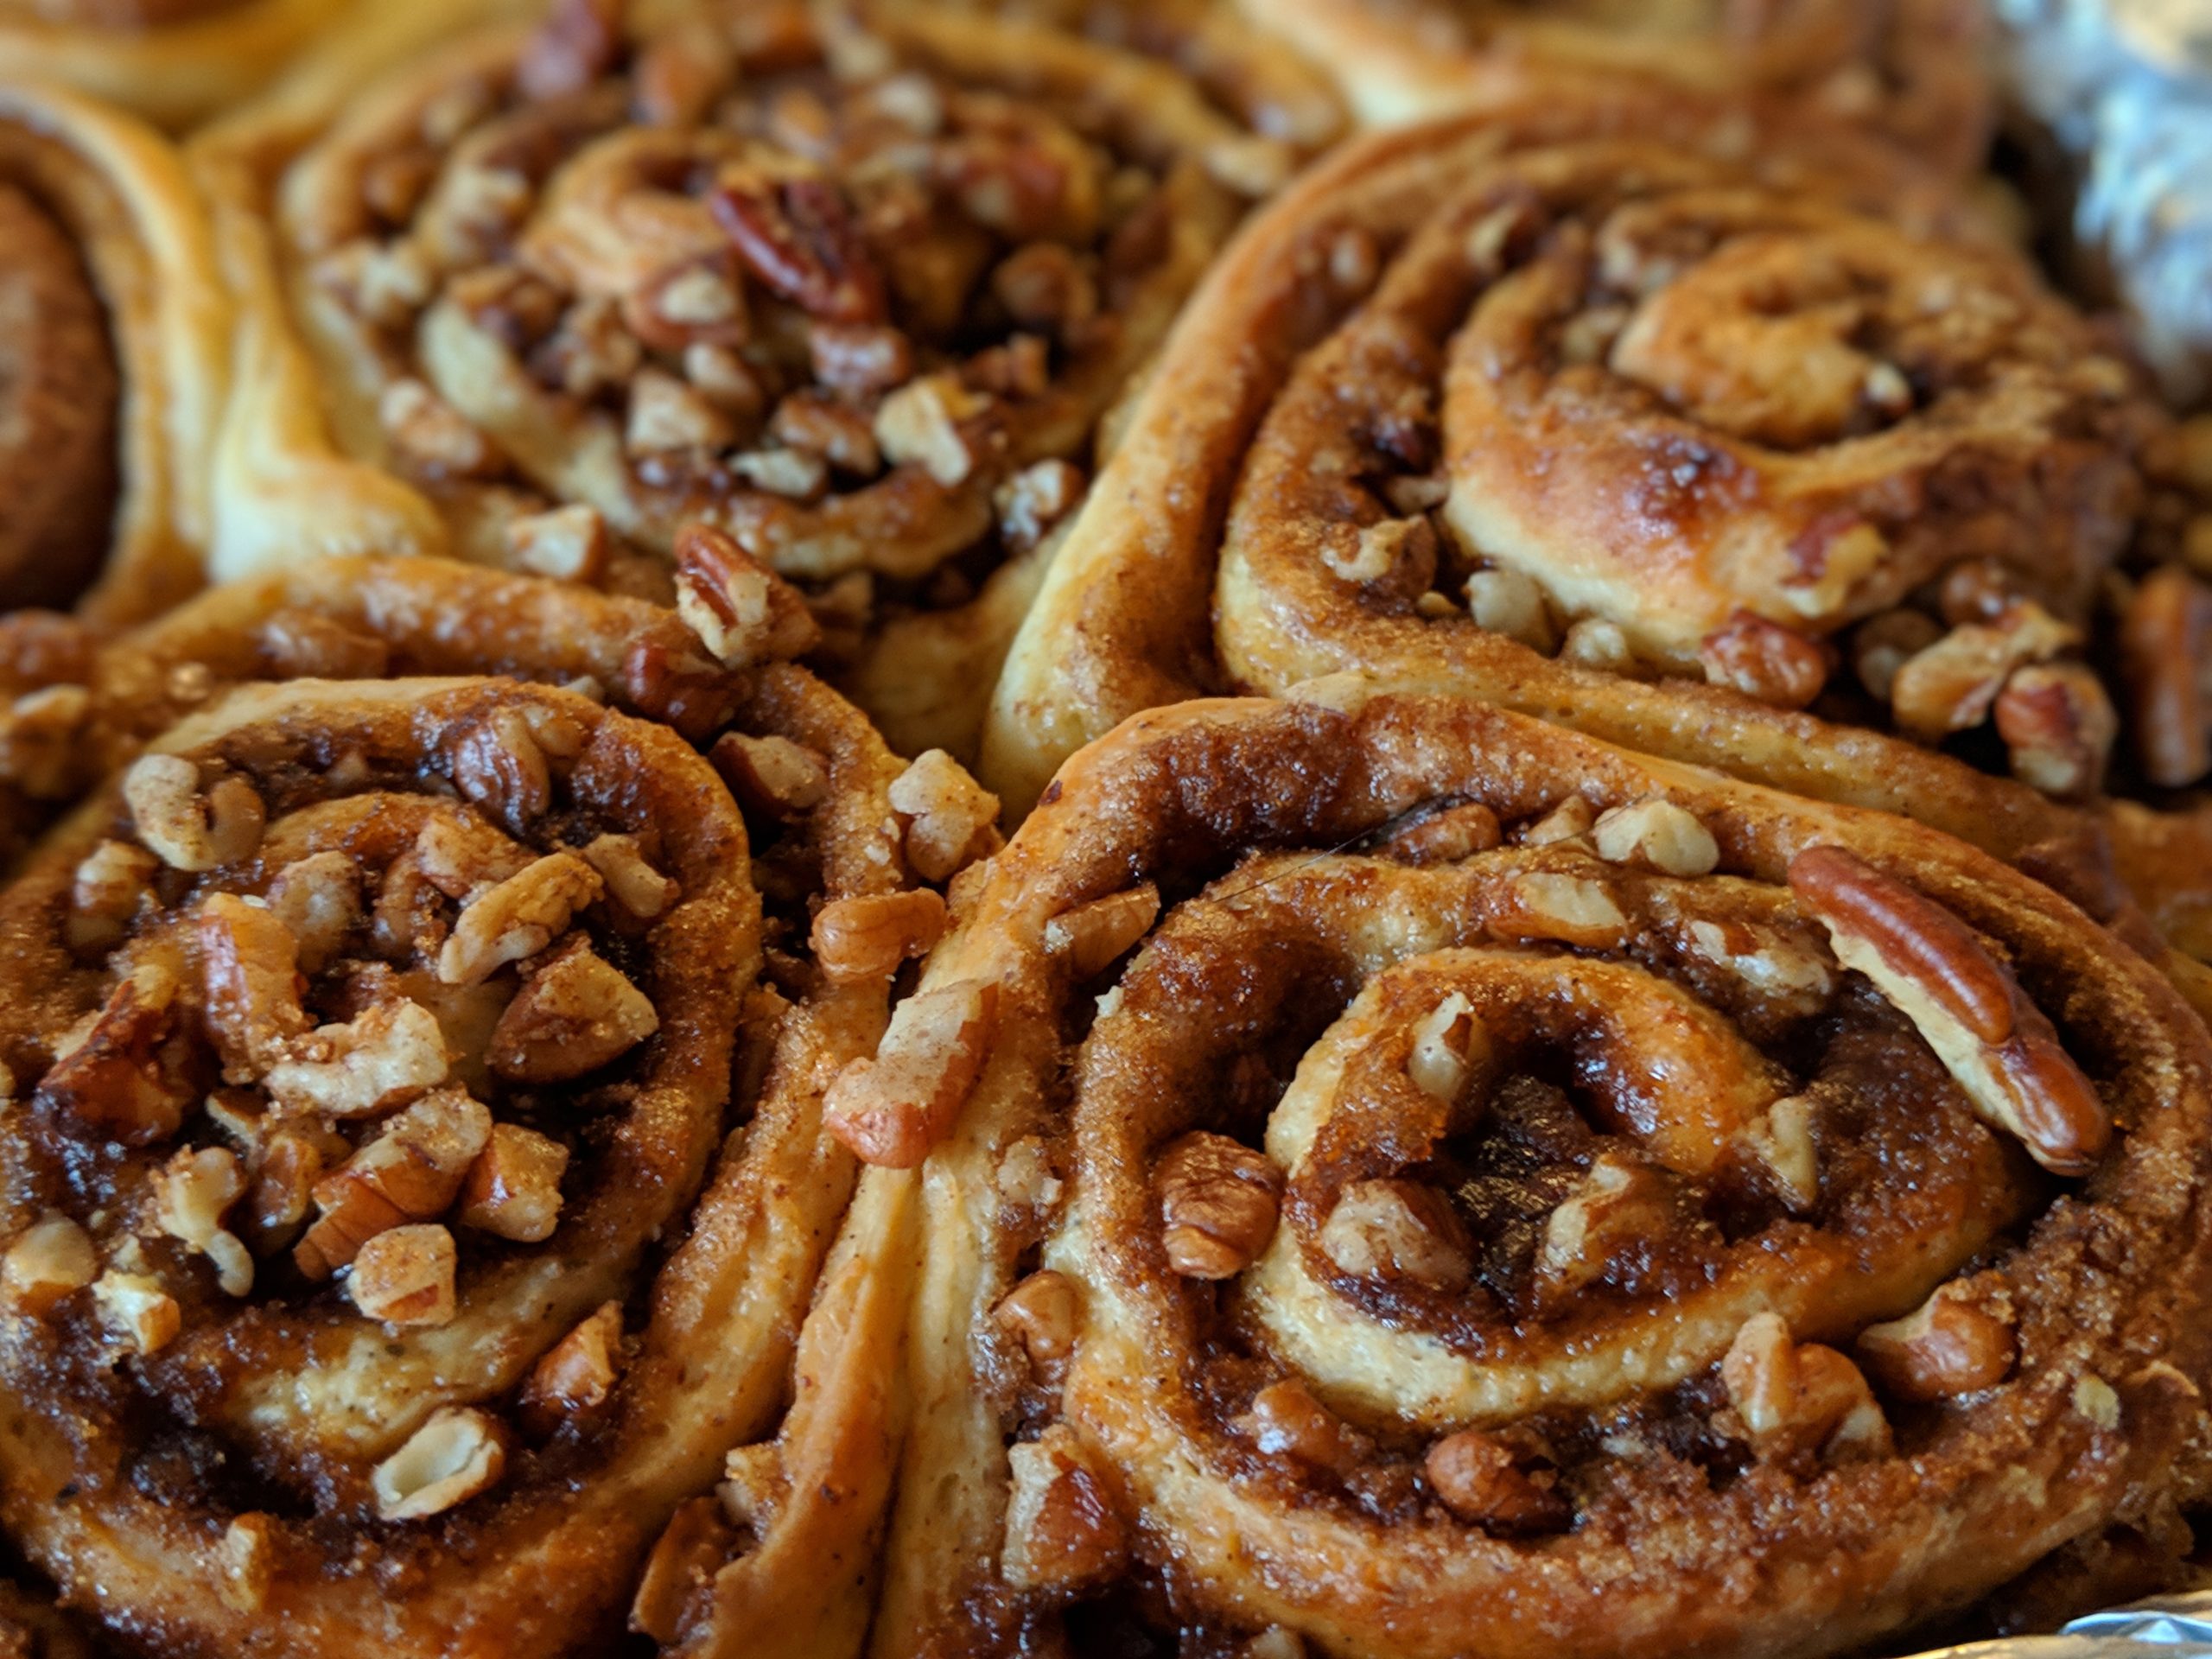
This recipe is a hit every single time I have made it..The rich but very delicate and light dough is what amazes everyone as they take a bite of this goodness.
What makes this recipe work?
The smaller size rolls are always tasty. The texture is not as dense as you will find in a store or bakery. You can easily gobble up a couple in one go. The filling is just perfect, the caramelized brown sugar on the inside makes a world of difference compared to using white granulated sugar. I prefer using the light brown sugar, so you can still maintain the light color of the dough and yet achieve the caramelized flavor.
Cinnamon always works great in the filling, but occasionally I would substitute it with Cardamon. The icing on the top, you can completely skip it, trust me, it will still be as good. But a light cream cheese icing drizzle on to the top, just kicks it up a notch. When using cardamon, I’d drizzle some good quality honey instead on these little rolls of happiness.
You can add pecans pieces to the center with the cinnamon and brown sugar which is my favorite version!
KEY TIPS:
- For the Dough, always assure all the ingredients are at room temperature. Move the eggs, butter and milk from the refrigerator to the kitchen counter roughly 6 hours before we begin. If I am making these early in the morning, I’d put those out on the counter before I go to bed.
- Make sure you weigh both the wet and dry instead of measuring them. Use a good quality weight scale to accurately weigh all the ingredients. In the world of bread and pastry making, this makes a big difference. Use the measurements below only as reference. I have included the weight for each ingredient.
- Use Instant yeast instead of Active dry yeast. It is also know as Rapid Rise, Fast Rising, Quick Rise yeast. This is very different from the regular Active Dry yeast.
- After spreading the filling and rolling the dough into a cylinder, assure that the cylinder is uniform in size. It is very easy to have edges to be smaller and center to be bigger. Adjust the cylinder so each cinnamon roll when cut is the same size. This will make sure they are all cooked evenly and will not dry up one of the smaller ones in the oven.
How to achieve the perfect rise?
Note: Be sure to measure all of these ingredients by weight. This is the single most important step for the dough to rise perfectly and create the soft and light texture we are after.
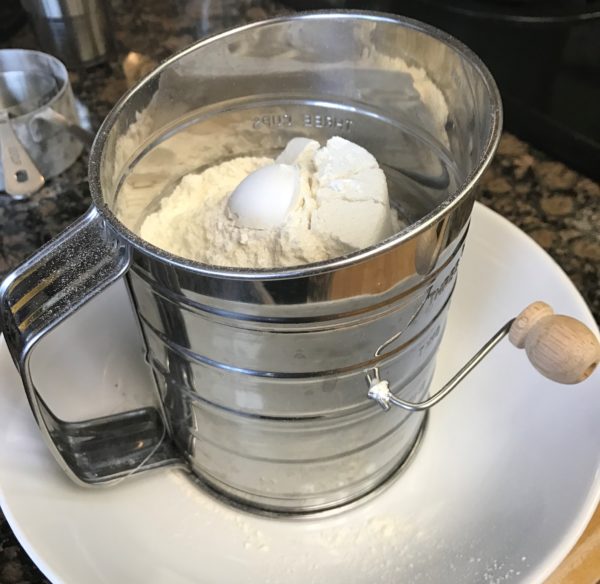
- 4 1/2 cups (21 1/4 ounces) All Purpose Flour
- 1/2 cup Cornstarch (2 ounces)
- 2 1/4 Tsp instant or rapid rise yeast
- 1 1/2 Tsp salt
- 3/4 cup (6 ounces) whole milk, at room temperature
- 1/2 cup (3 1/2 ounces) granulated sugar
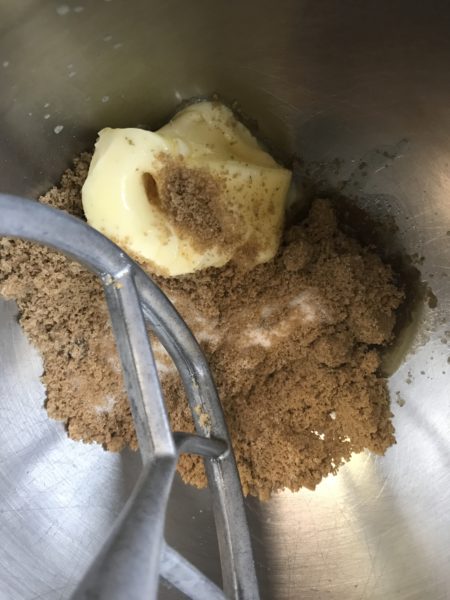
- 12 Tbs (6 ounces) unsalted butter, softened
- Whisk the flour, yeast, cornstarch and salt together in a bowl of a stand mixer.
- Whisk the eggs, milk and sugar until the sugar has completely dissolved.
- Using the dough hook of the mixture at very low speed combine the milk mixture to the flour mix until no flour remains at the bottom of the mixture. You may have to scrape the edges to combine them. The dough will be quite sticky at this time.
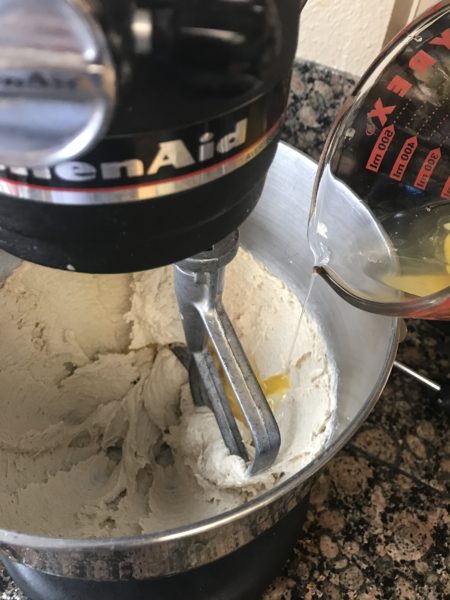
- Turn the mixer up to a medium speed, use the same dough hook attachment. Add the butter 1 Tablespoon at a time. Wait for the 1st tablespoon to get incorporated before adding the 2nd. Knead until all the butter is incorporated about 8 to 10 minutes. Then continue to knead until the dough is smooth and elastic and easily clears off the sides of the bowl.
- Transfer this is to a lightly floured surface and knead by hand for a couple more minutes. Form a round smooth ball and place the dough seem side down, smooth side up in a lightly greased large bowl or container. Be sure that the size of the bowl is atleast 4-5 times the size of the dough. Let it sit on the counter for the next 6-8 hours. It takes mine atleast 6-7 hours to rise to the state I like. G It would be a good idea to make the dough the night before, right before bed. It would be ready for you first thing early morning.
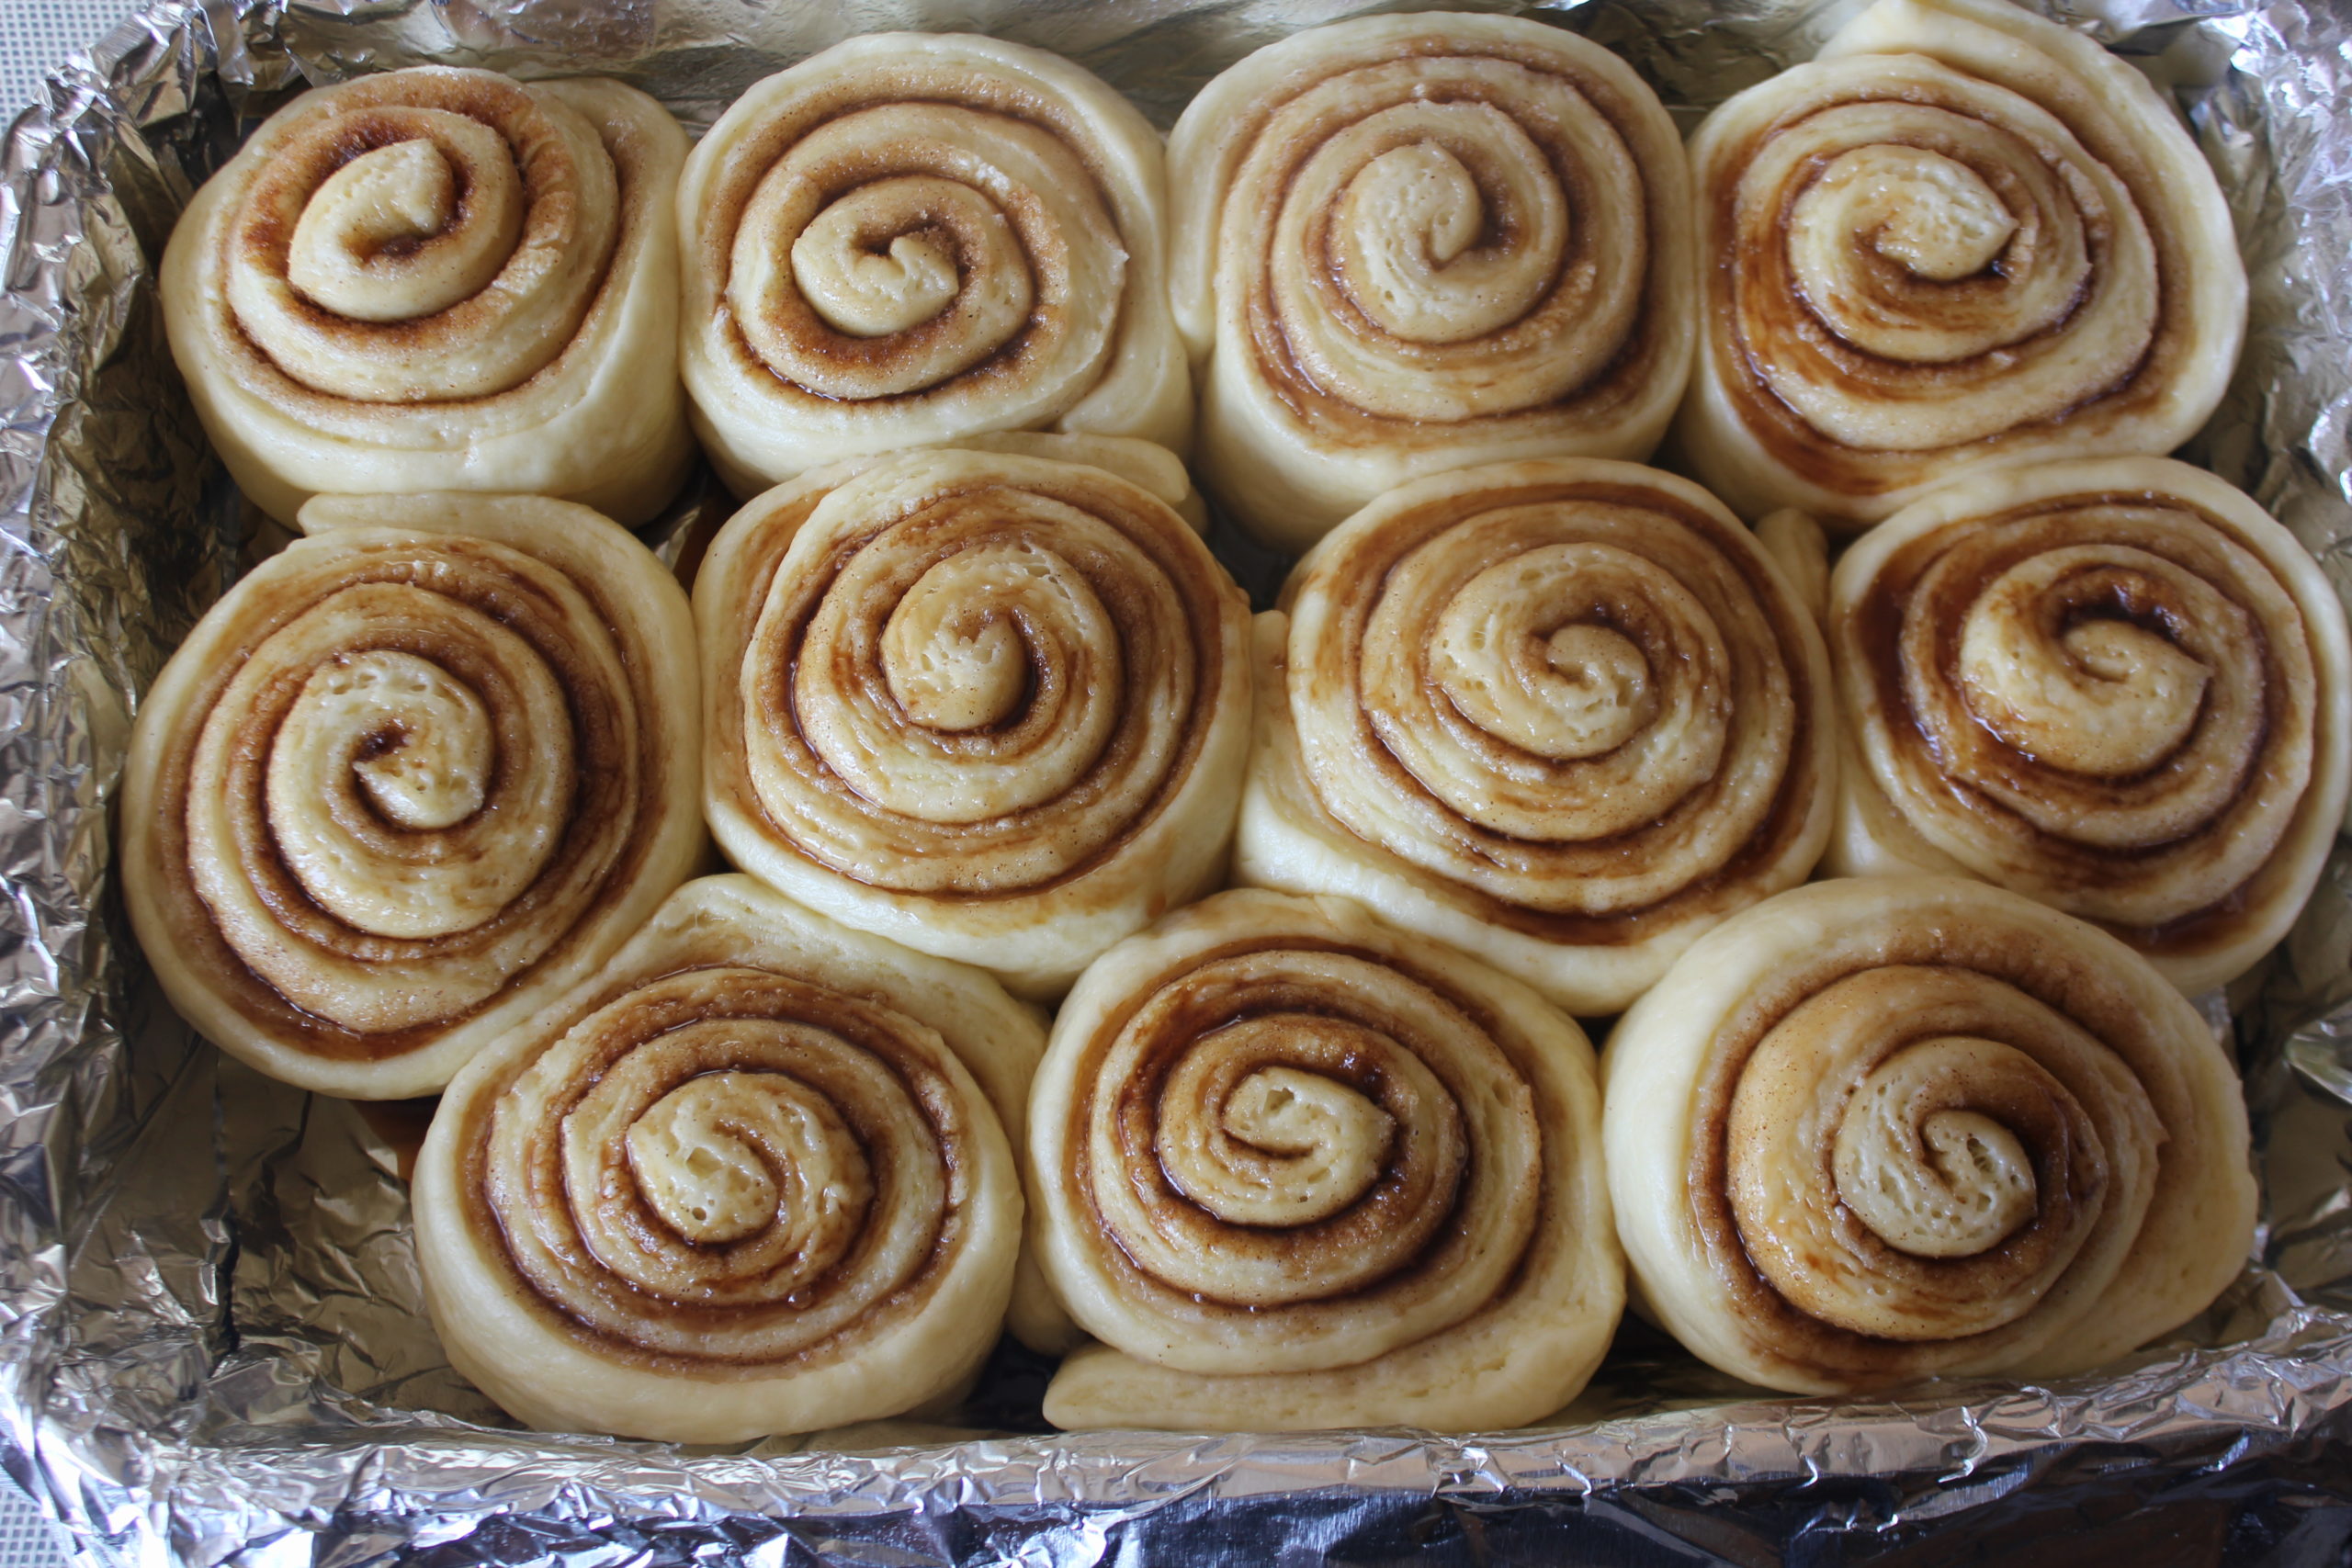
- Line the bottom of the pan with foil. Use 2 long sheets of aluminum, 1st one 13 inch wide and the 2nd one 9 inches wide. Lay the sheets of foil perpendicular to each other in a 13×9 inch pan with extra foil hanging over the sides of the pan. The sheets should go up the sides and corners of the pan. This would assure the rolls don’t stick to the pan and can be taken out easy. Further, spray the entire foil on top with a vegetable oil spray.
How to make the Filling?
For the Filling, you’ll need:
- 1 1/2 cups packed (10 1/2 ounces) light brown sugar
- 1 1/2 Tbs ground cinnamon
- 1/4 Tsp Salt
- 1 cup of Pecan pieces if using
Using a whisk, combine to mix well.
Let’s roll it up..
You’ll need:
- 4 Tbs (2 ounces) unsalted butter, softened
The butter should be nice and soft so it can be brushed on the rolled dough.
- First, deflate the dough by pressing it down. Then on a lightly floured surface, roll the dough to form an 18 inch square.
- Brush the softened unsalted butter to the dough evenly, leaving about ½ inch around the edges.
- Sprinkle the sugar mix on the butter dough, leaving the same ½ inch around the edges. Lightly press it so it adheres to the butter. Leaving the ½ inch around the edges is important to seal the rolled cylinder in the next step.
- Add the pecans (if using) on top of the sugar mix, pushing them in slightly.
- Carefully roll the rough away from yourself, keep the roll nice and taut and make a cylinder. Pinch the seam closed at the end. Now you can adjust the and reshape this cylinder to an uniform thickness. This is important so that each cinnamon roll is the same size and will bake uniformly.
- Using a serrated knife, cut the cylinder into 8 -12 pieces.
- Place each roll, cut side down on the prepared baking pan. Cover the rolls loosely with plastic wrap and let this sit for about 2 hours until the rolls rise and fill up the pan.
Baking the Rolls
- Adjust rack to the middle position in the oven preheat the oven to 350F.
- Bake until the buns are golden brown. It should take between 35 to 45 mins. If using a convection oven, maybe done slightly earlier.
- Rotate the pan around half way during the baking process to get an even color and bake.
- Once you pull the rolls out of the oven, use a fork to give it a quick check in the center of the rolls. Although brown on the outside, if your rolls are big, the center could still be doughy.
- If it is bake it for a bit longer. Check every 5 mins, since you do not want your rolls to over bake and be dry.
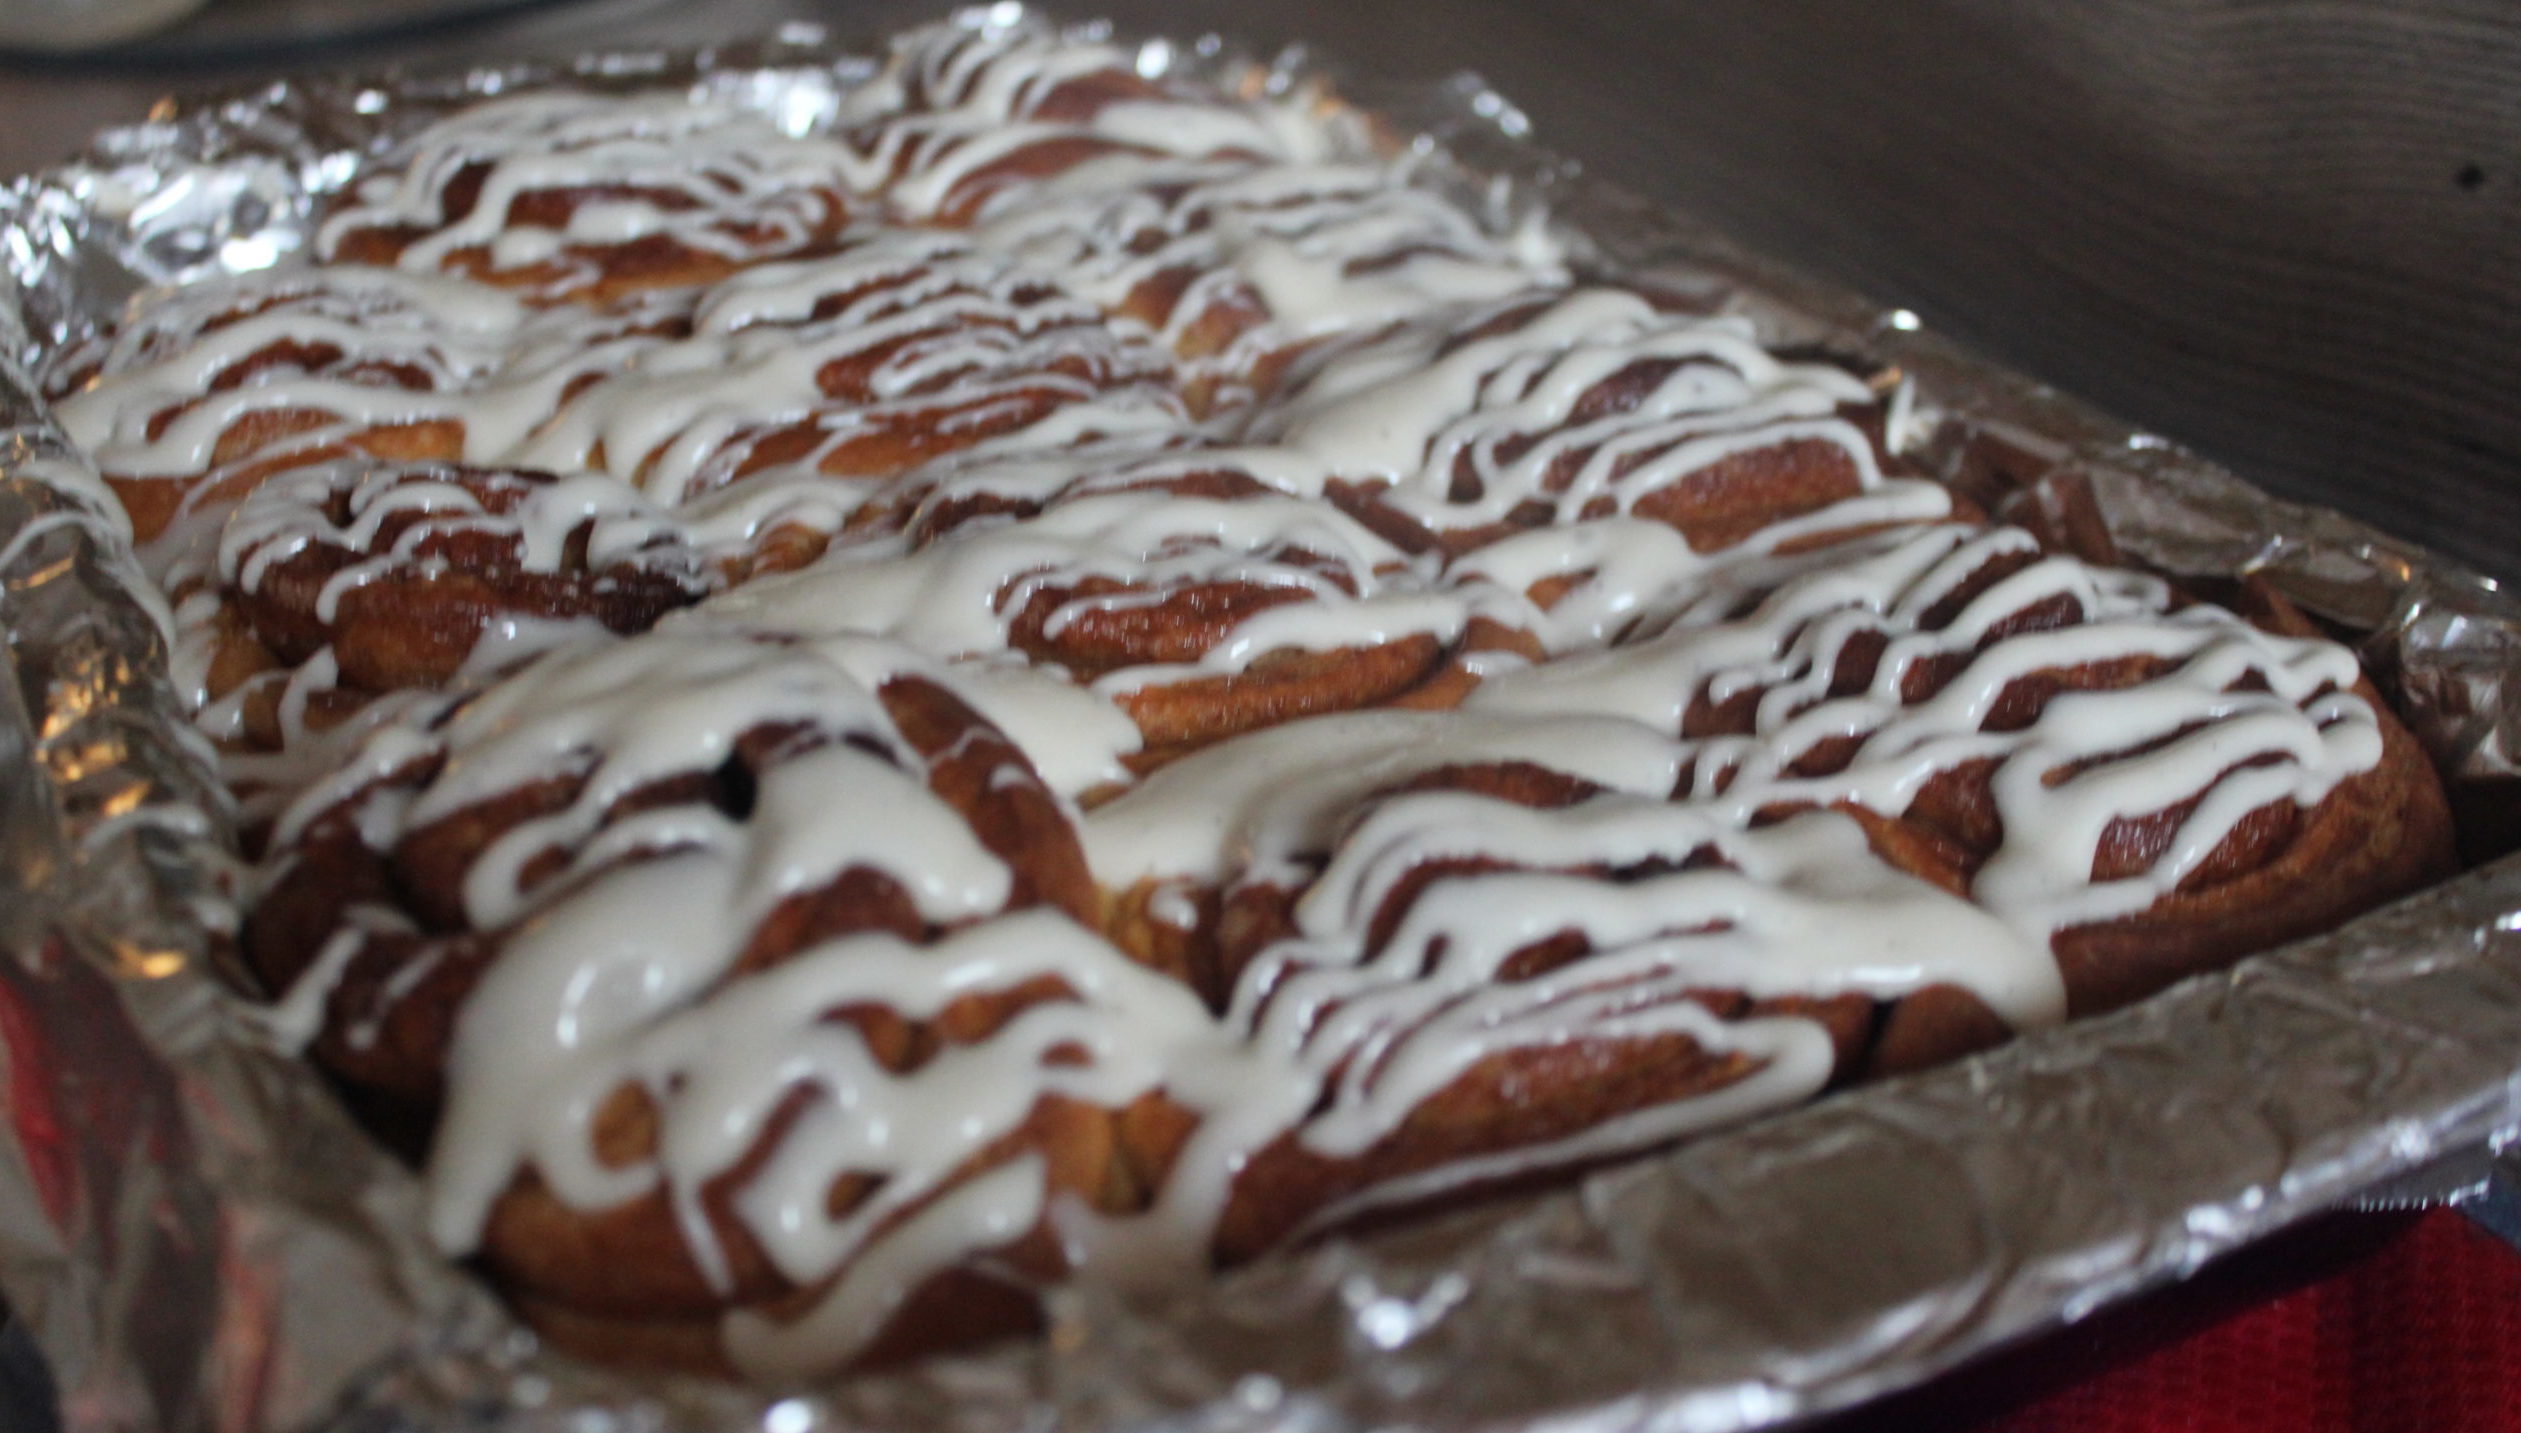
The Glaze
- 1 1/2 cups (6 ounces) confectioner’s sugar
- 4 ounces cream cheese, softened
- 1 Tbs whole milk
- 1 Tsp vanilla bean paste or vanilla extract
- Whisk all of the ingredients till smooth.
- Be sure to check if the insides of the rolls are cooked before brushing on the glaze. You may need to put these back in the oven if centers are not fully done.
- Cool the rolls for about an hour before you drizzle the glaze on it. Putting the glaze on the rolls when they are warm will cause the glaze to get soaked up.
Eat them when they are still a little warm! I promise you each time you deliver these rolls to someone, you’ll be making a new best friend. Enjoy
Dark Chocolate Brownies
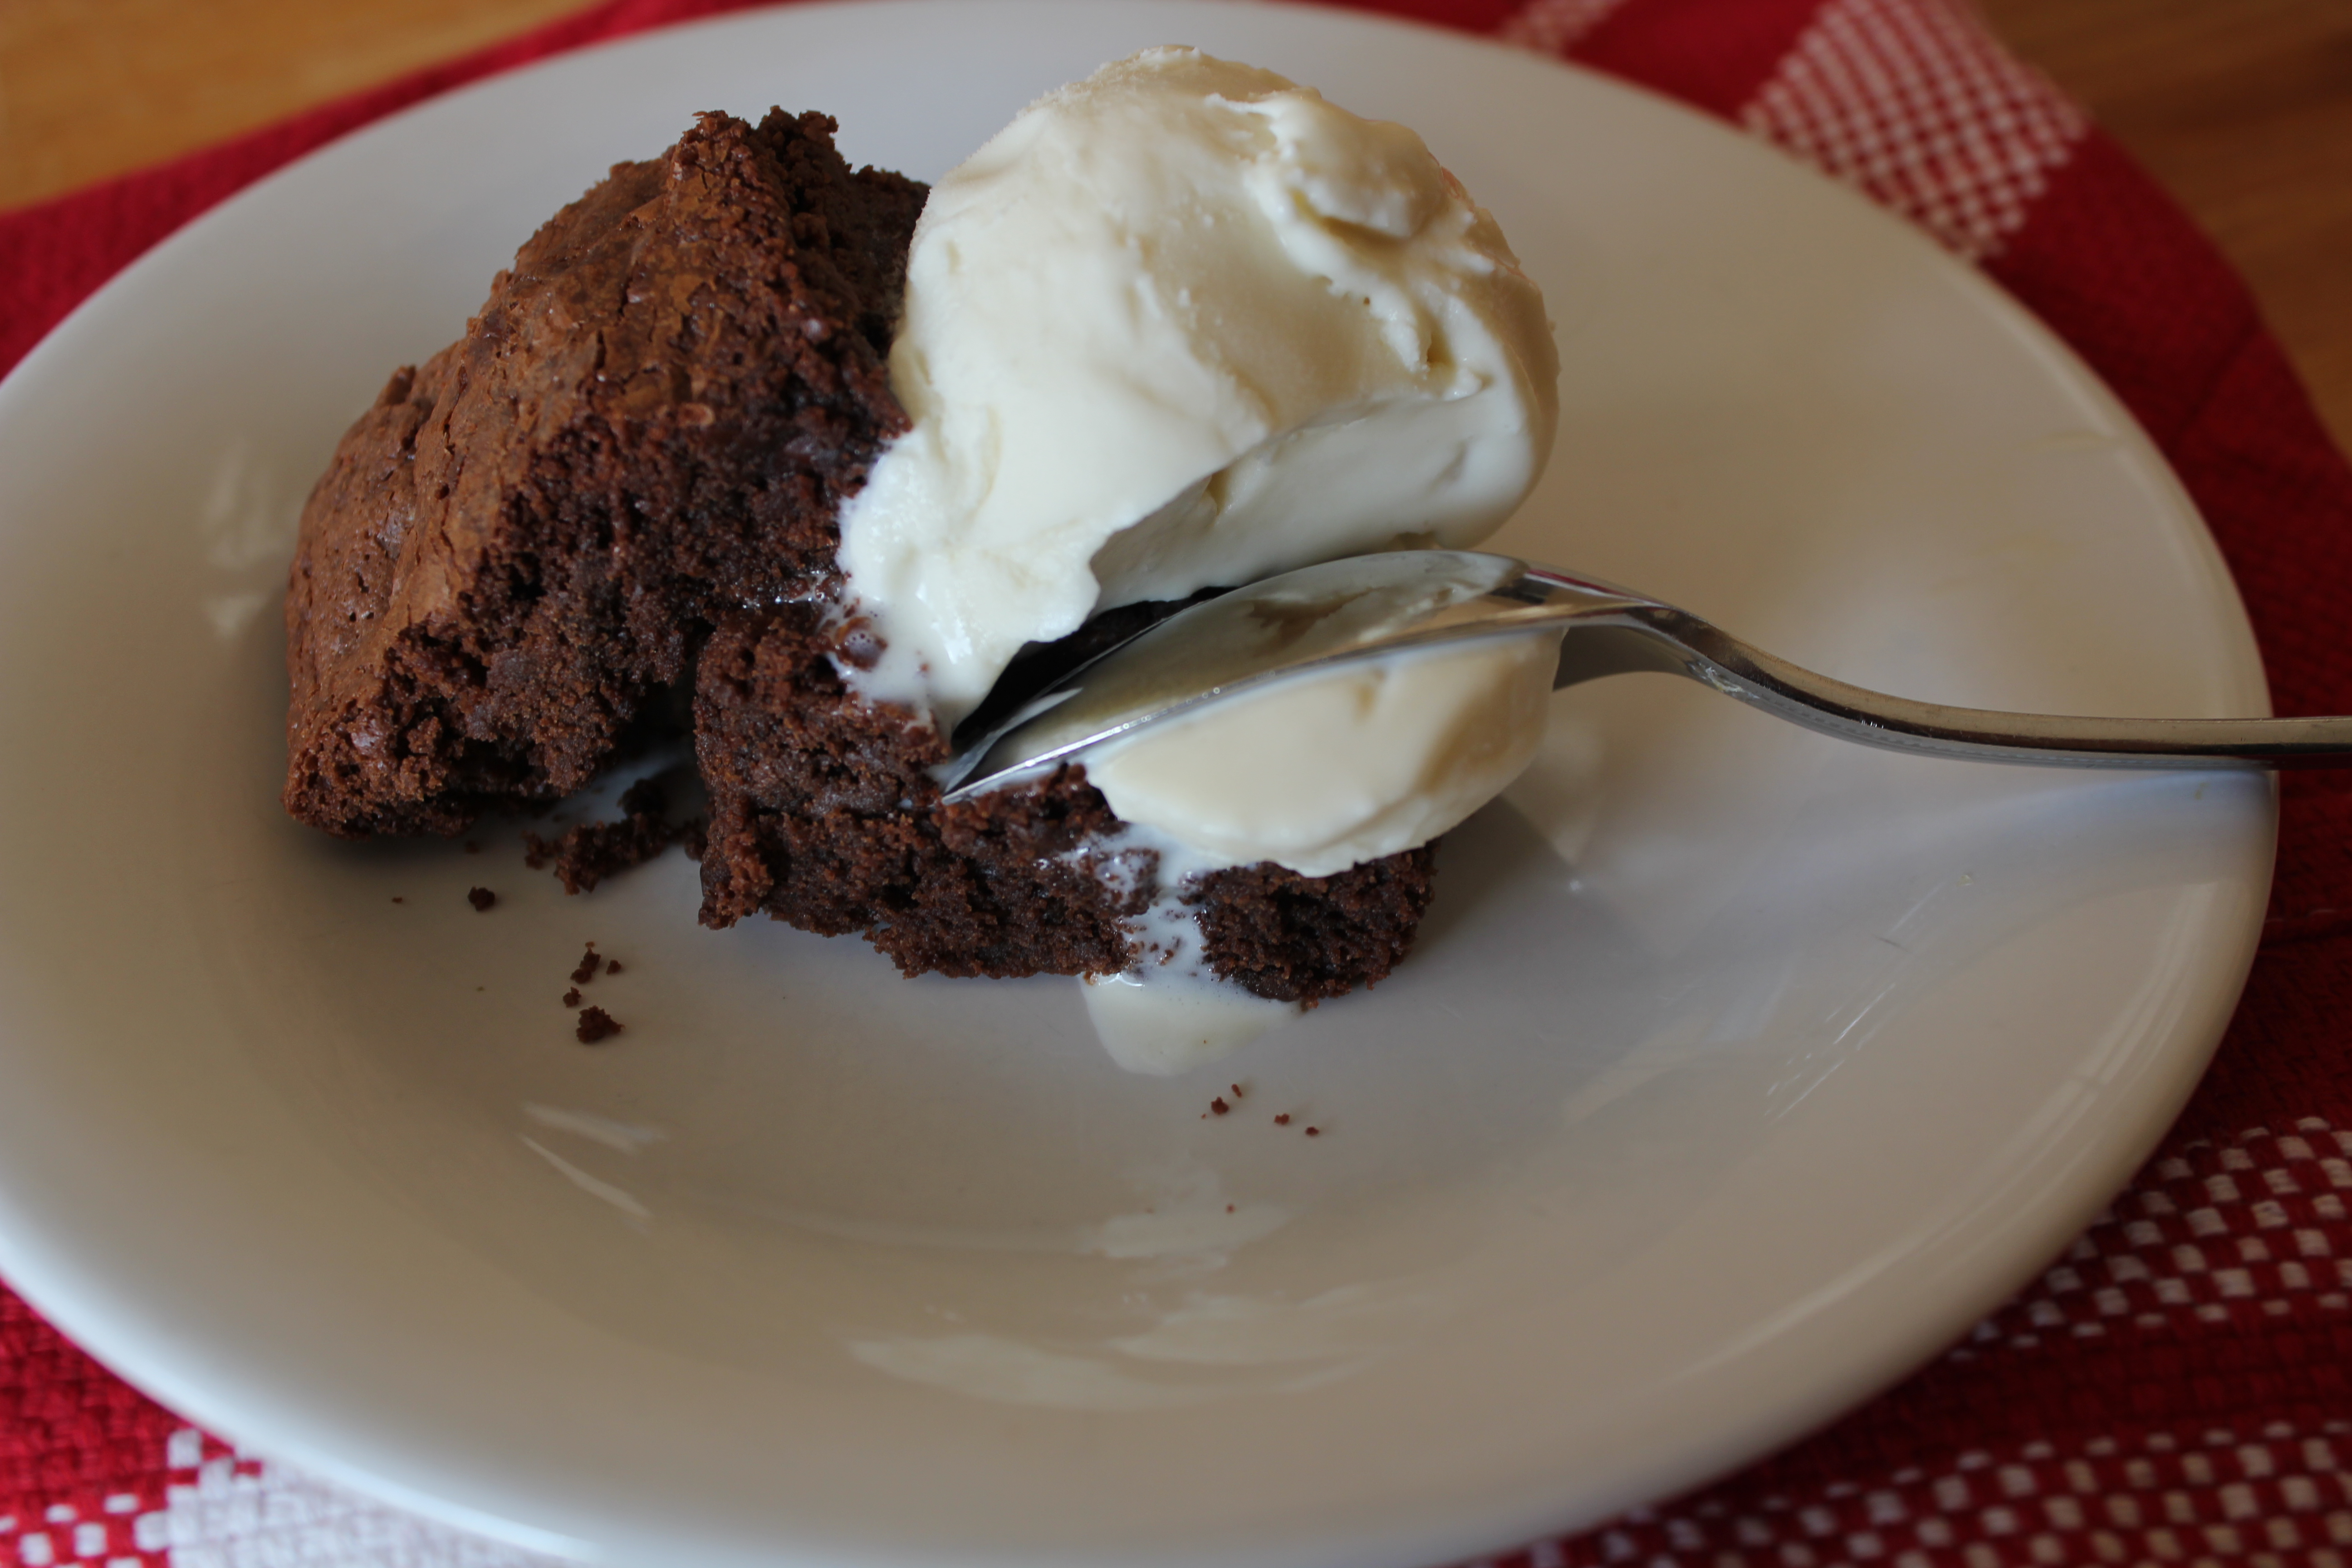
Now who doesn’t enjoy a nice warm brownie with large scoop of vanilla ice cream on top. This recipe a dark chocolate lover’s dream come true. You can use as dark of a chocolate as you desire. For me the 63-75% dark is perfect..

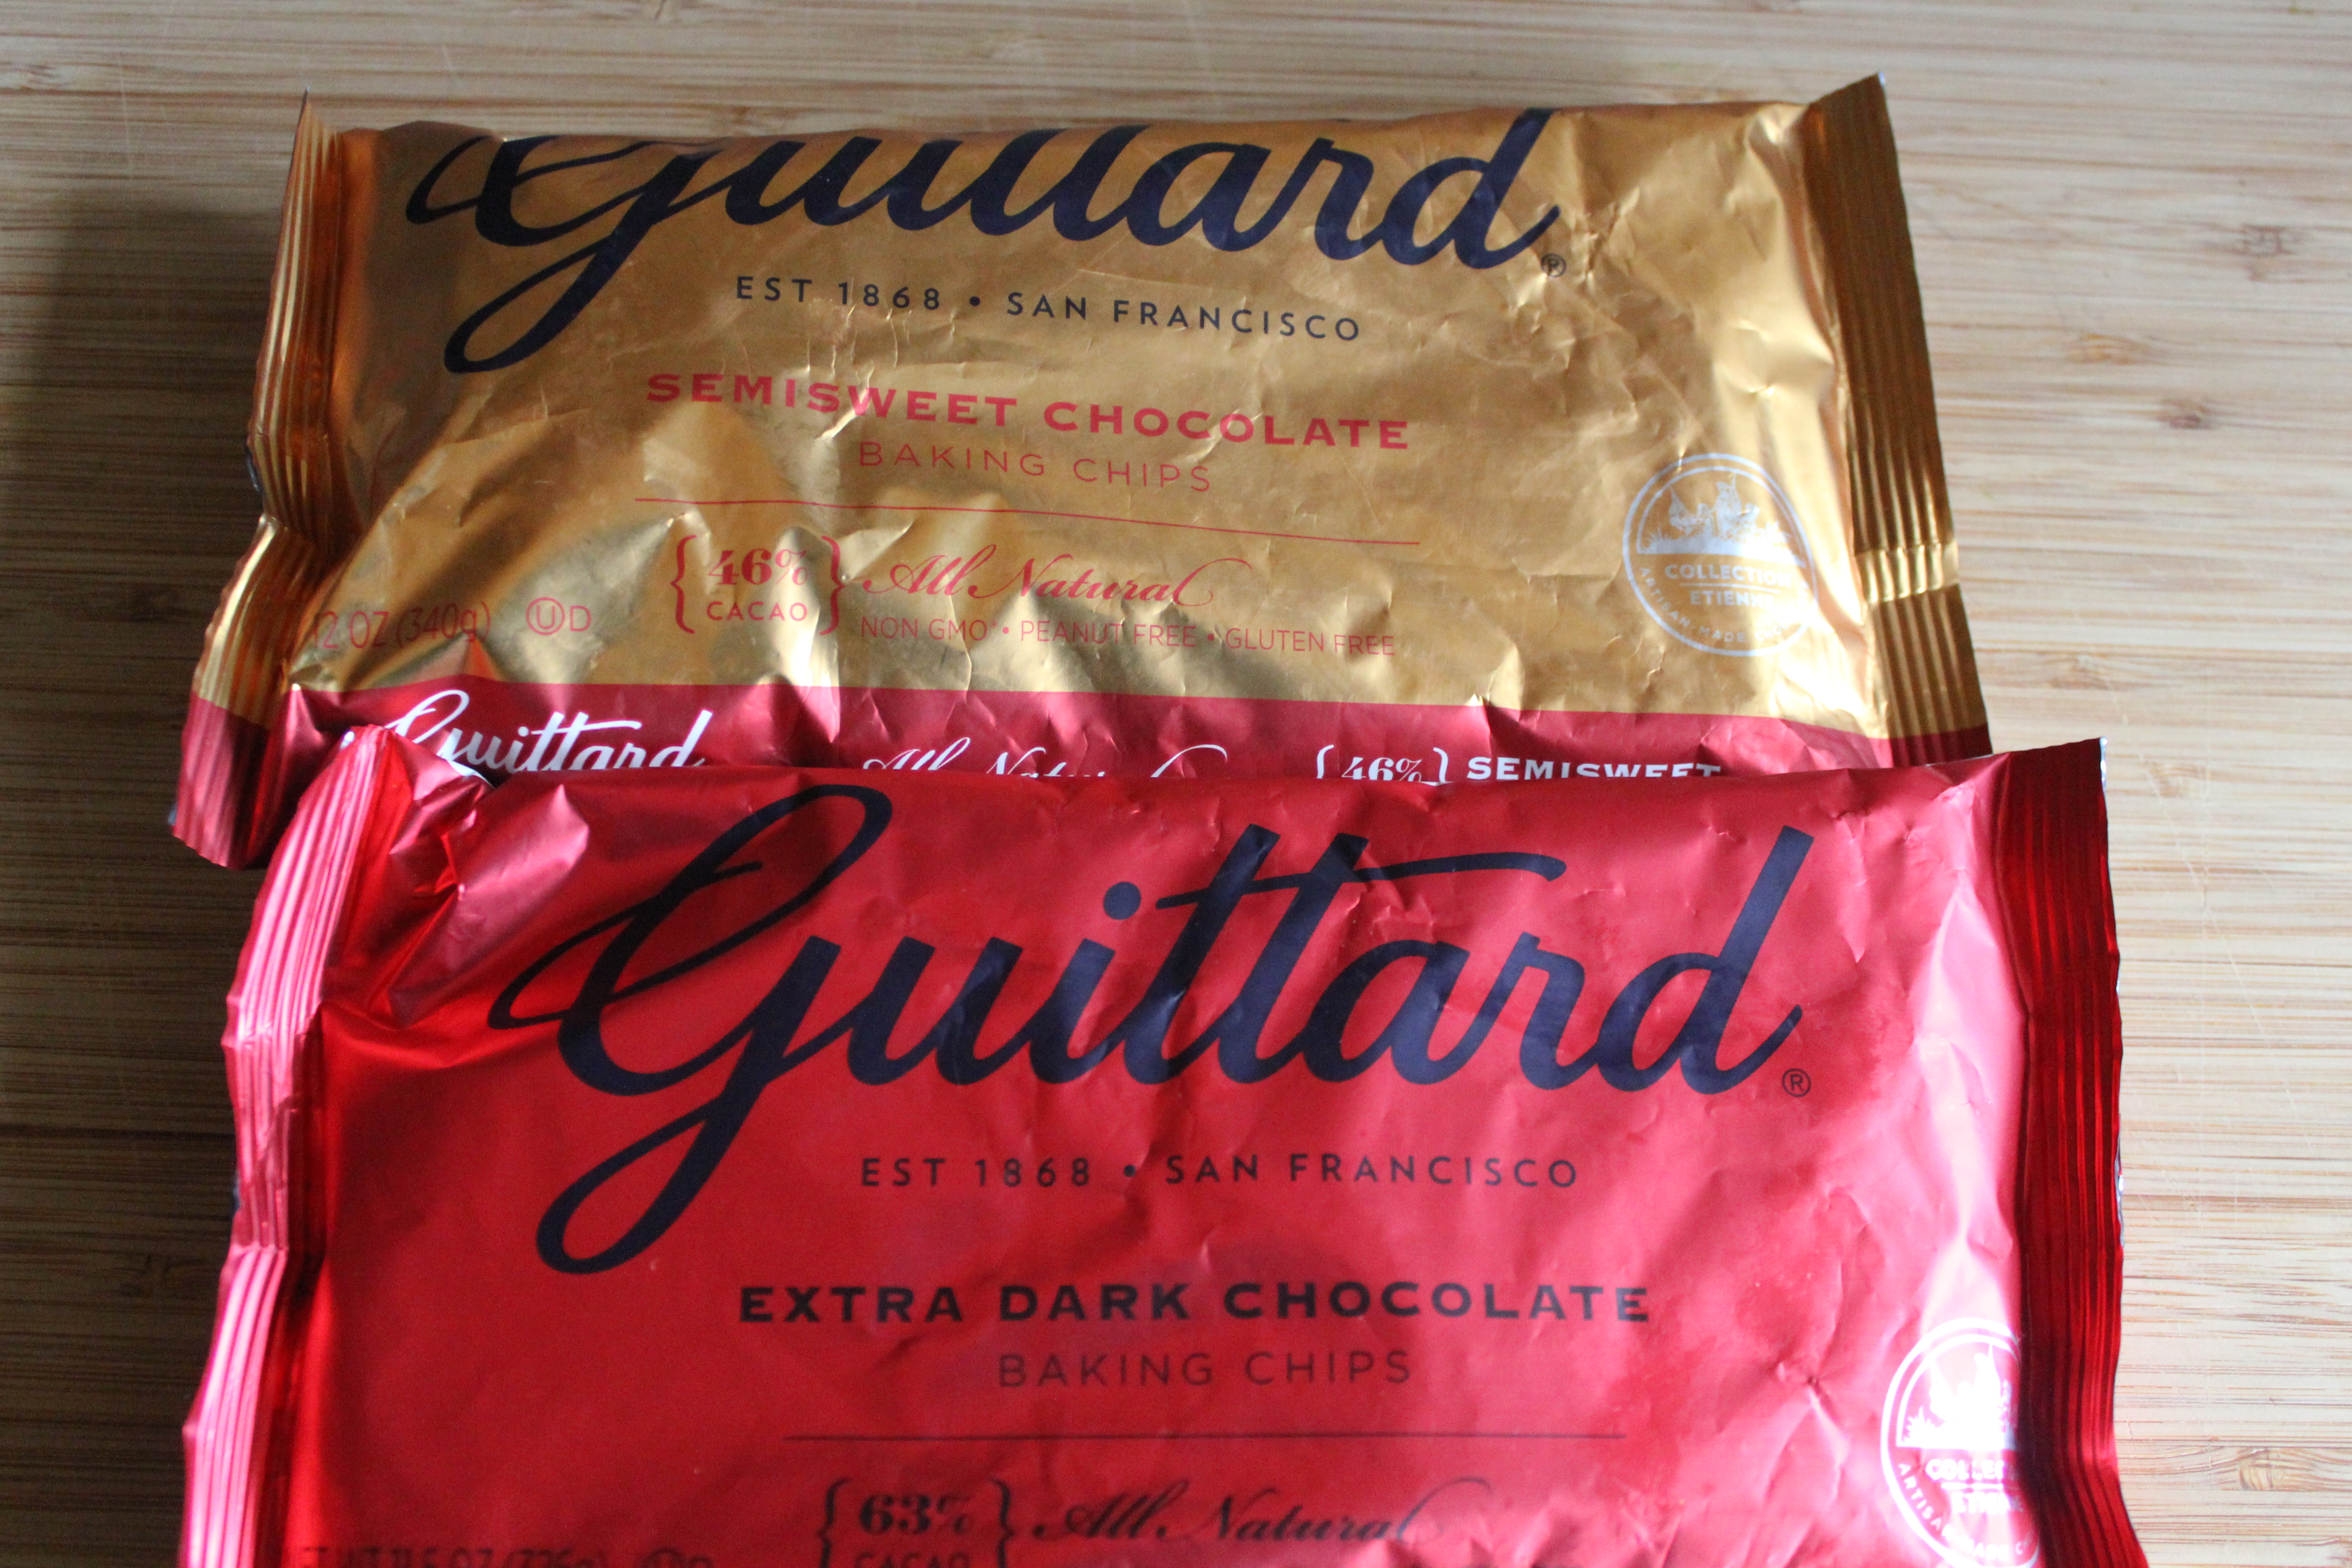
For the chocolate, my favorite chocolate of choice is 63% Extra Dark Guittard chocolate mixed with Semisweet Guittard chocolate chips. Key to a good tasting brownie is in the chocolate used..all the flavor comes from chocolate, so use your favorite good quality chocolate for the recipe.
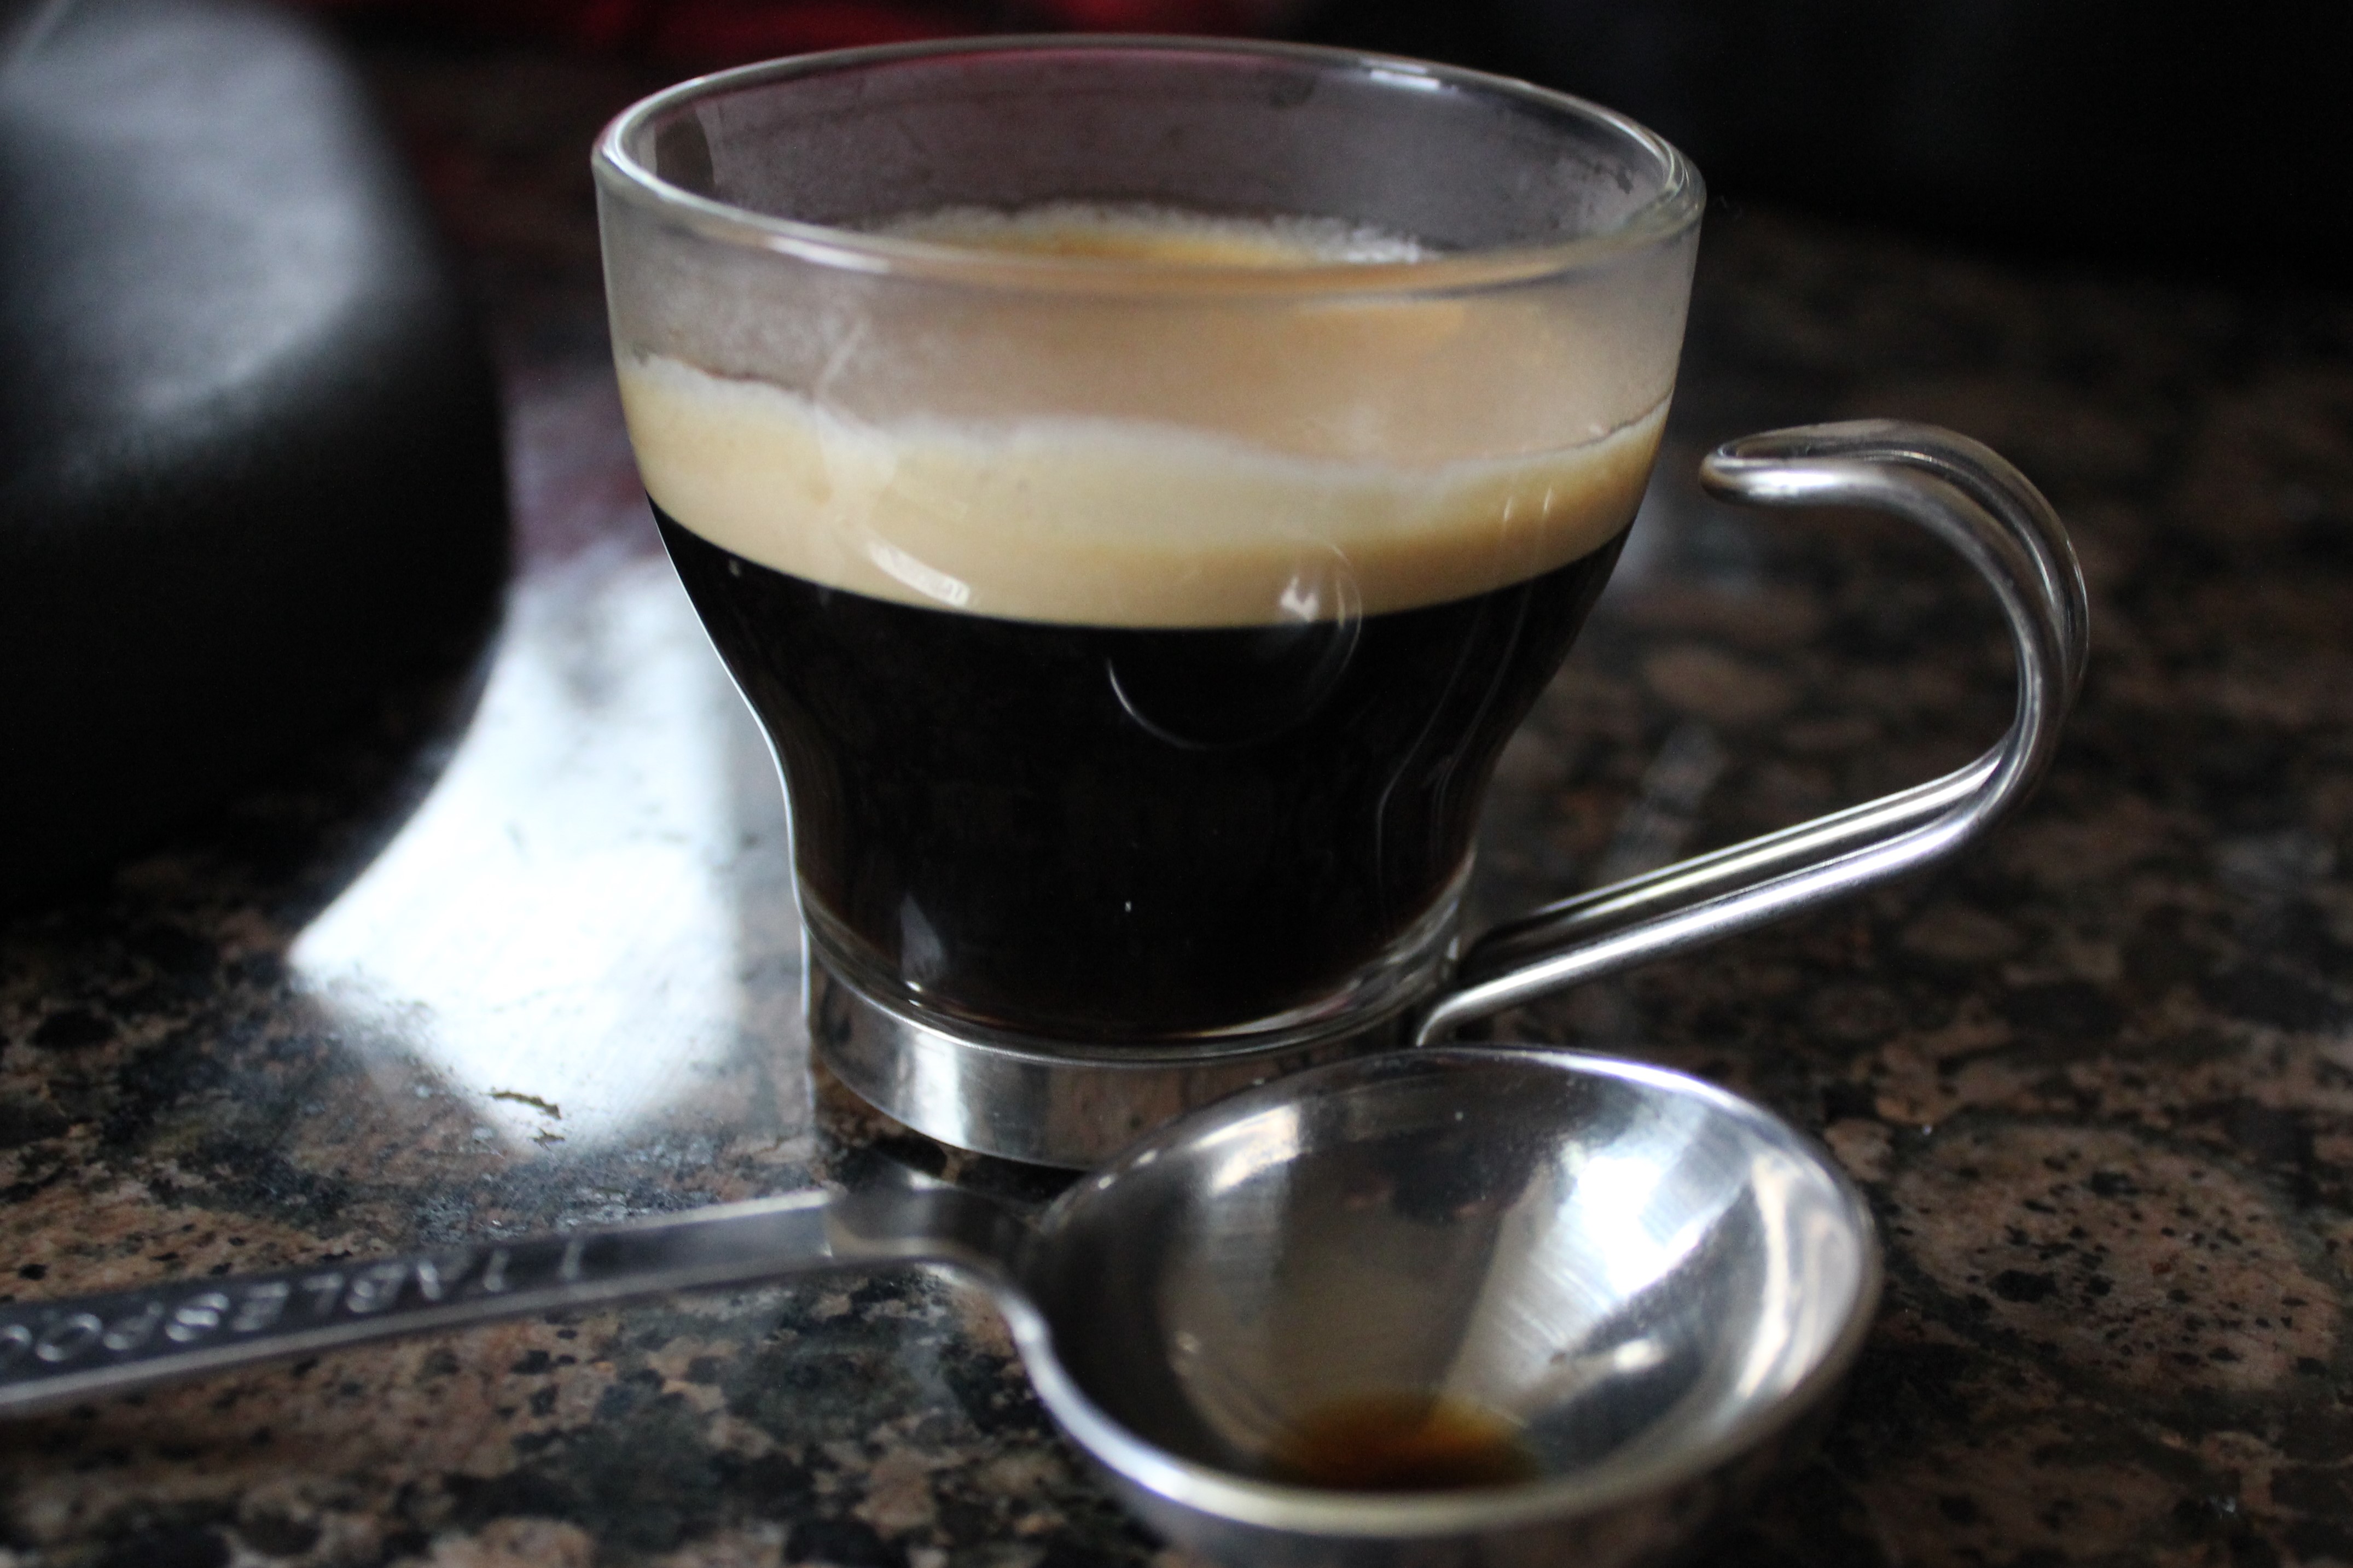
Some brownie recipes do include walnuts, but this recipe is pure chocolate all the way. Interesting ingredient you’ll find in most brownie recipes is instant coffee powder or espresso. For this recipe, I have used 2tbs of espresso. You may substitute with 1tbs of instant coffee instead. Coffee is used to enhance and boost the chocolate flavor in a the brownie, you will not taste the coffee.
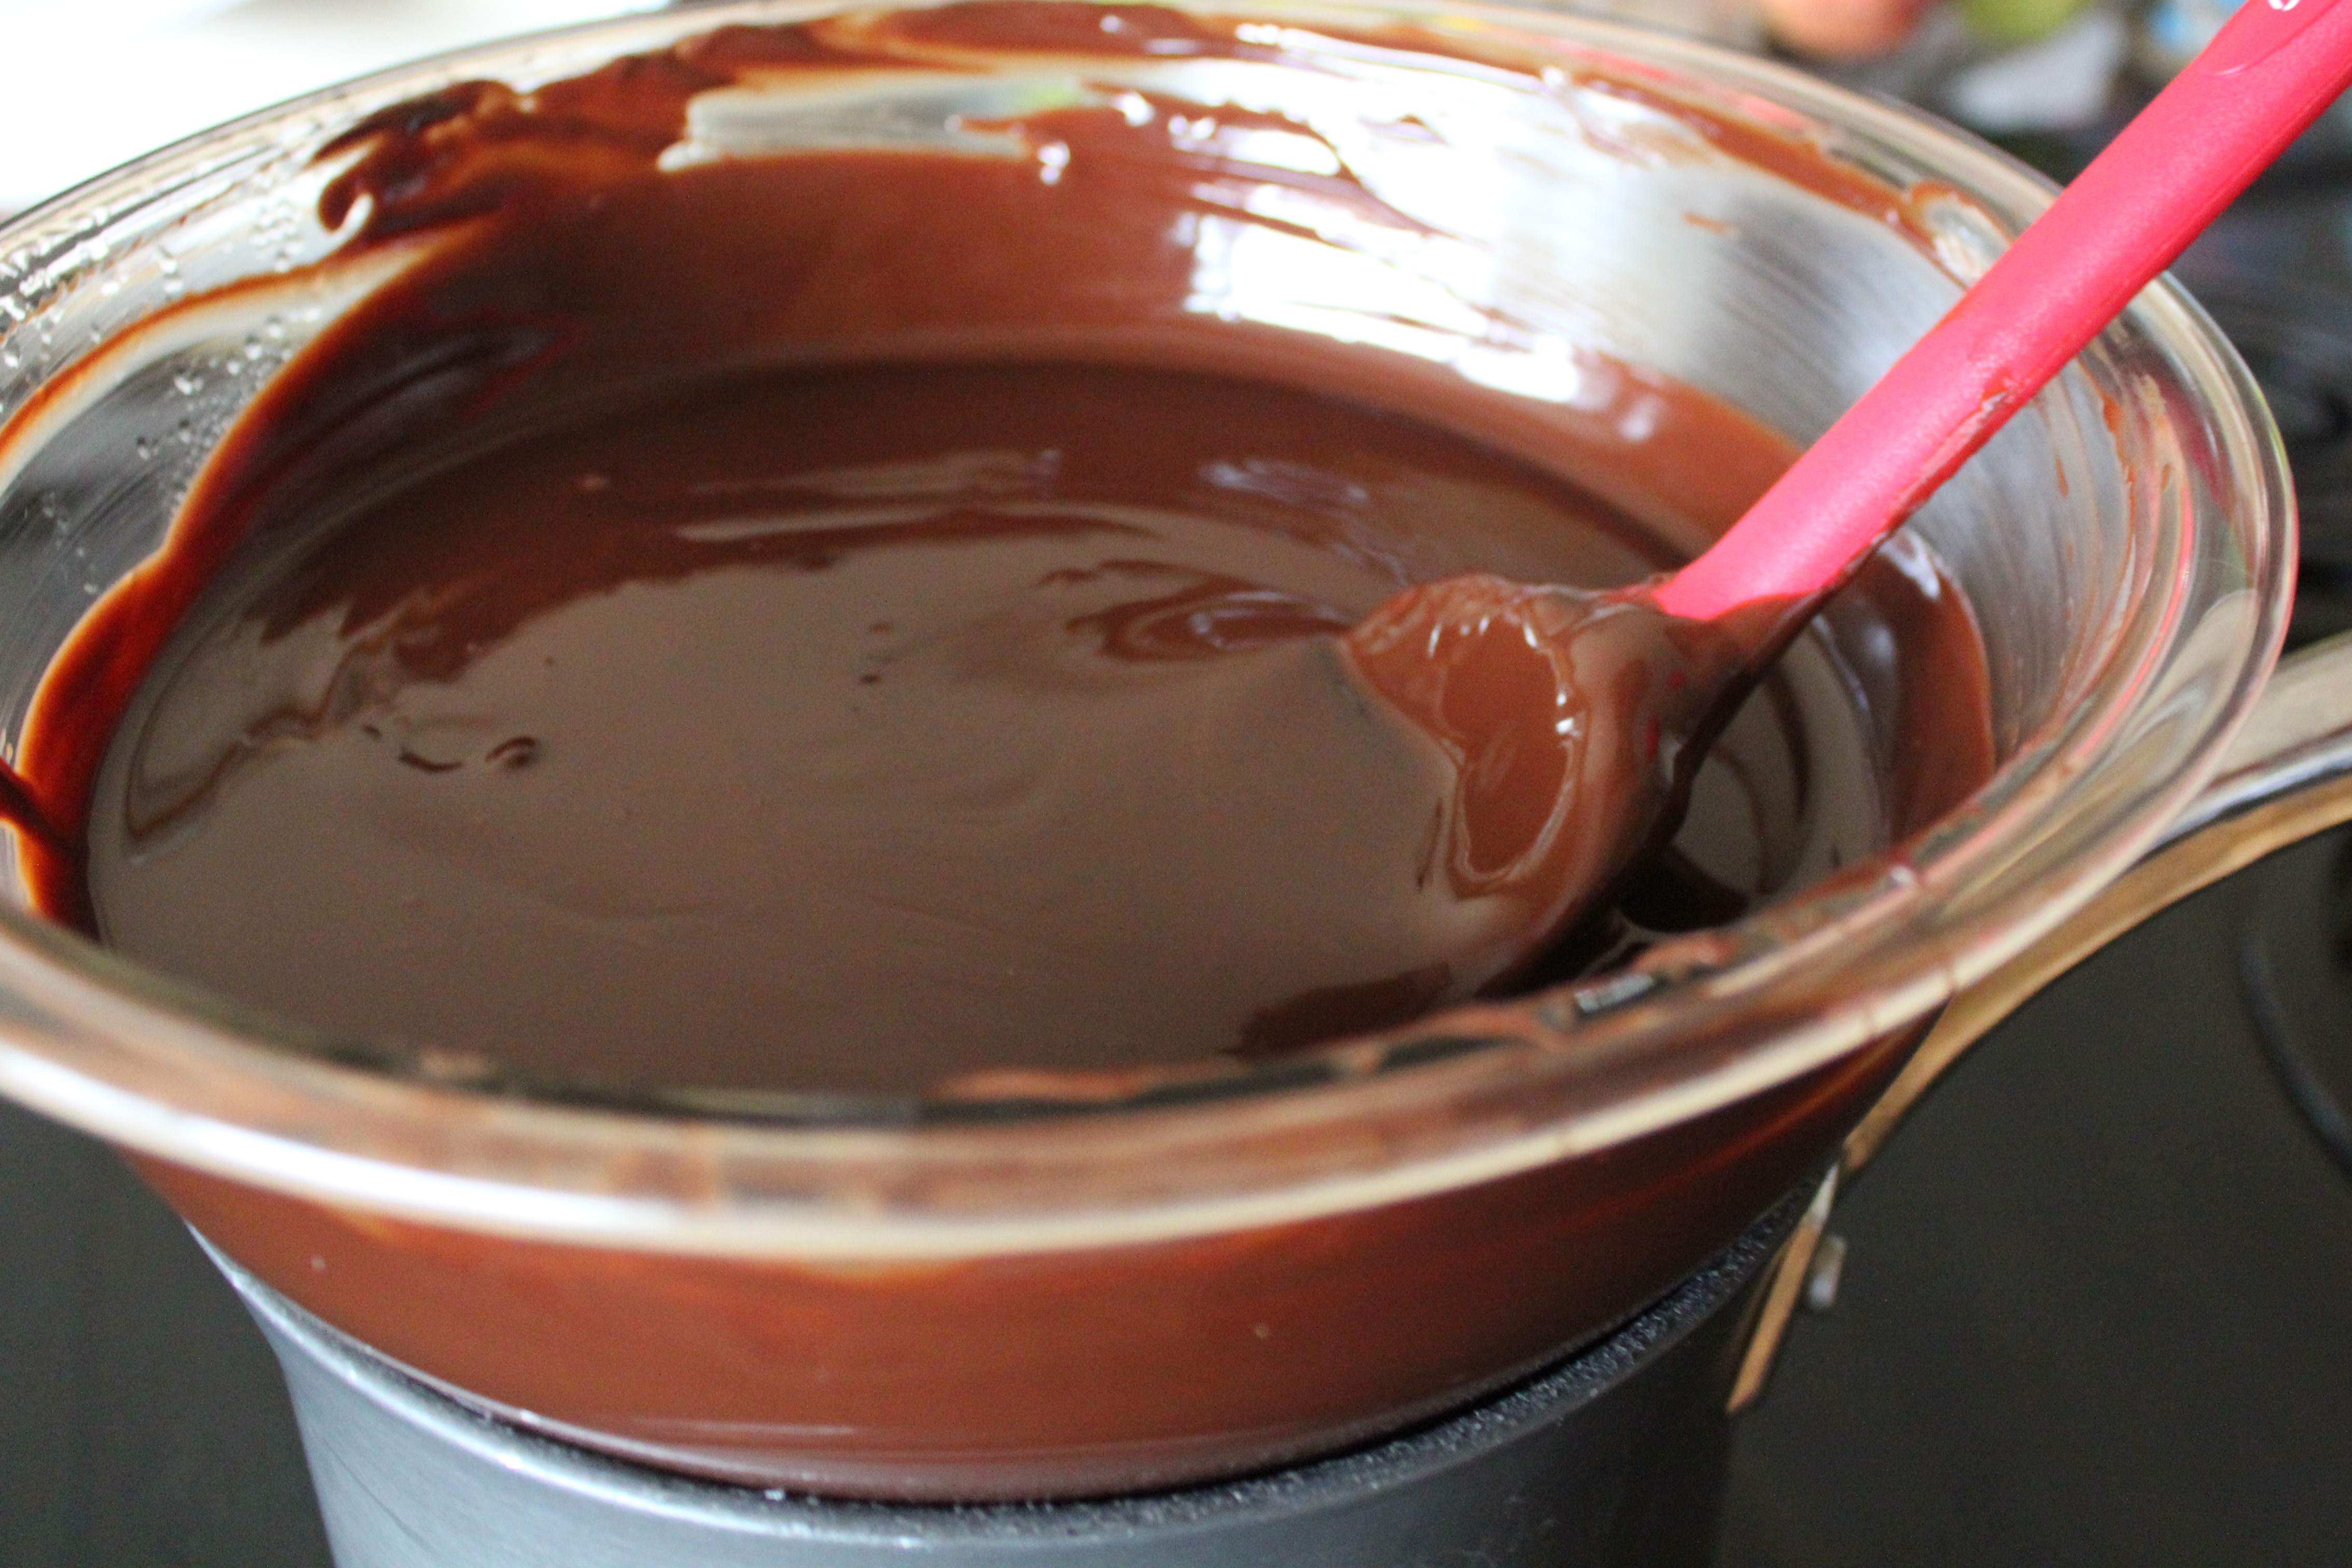
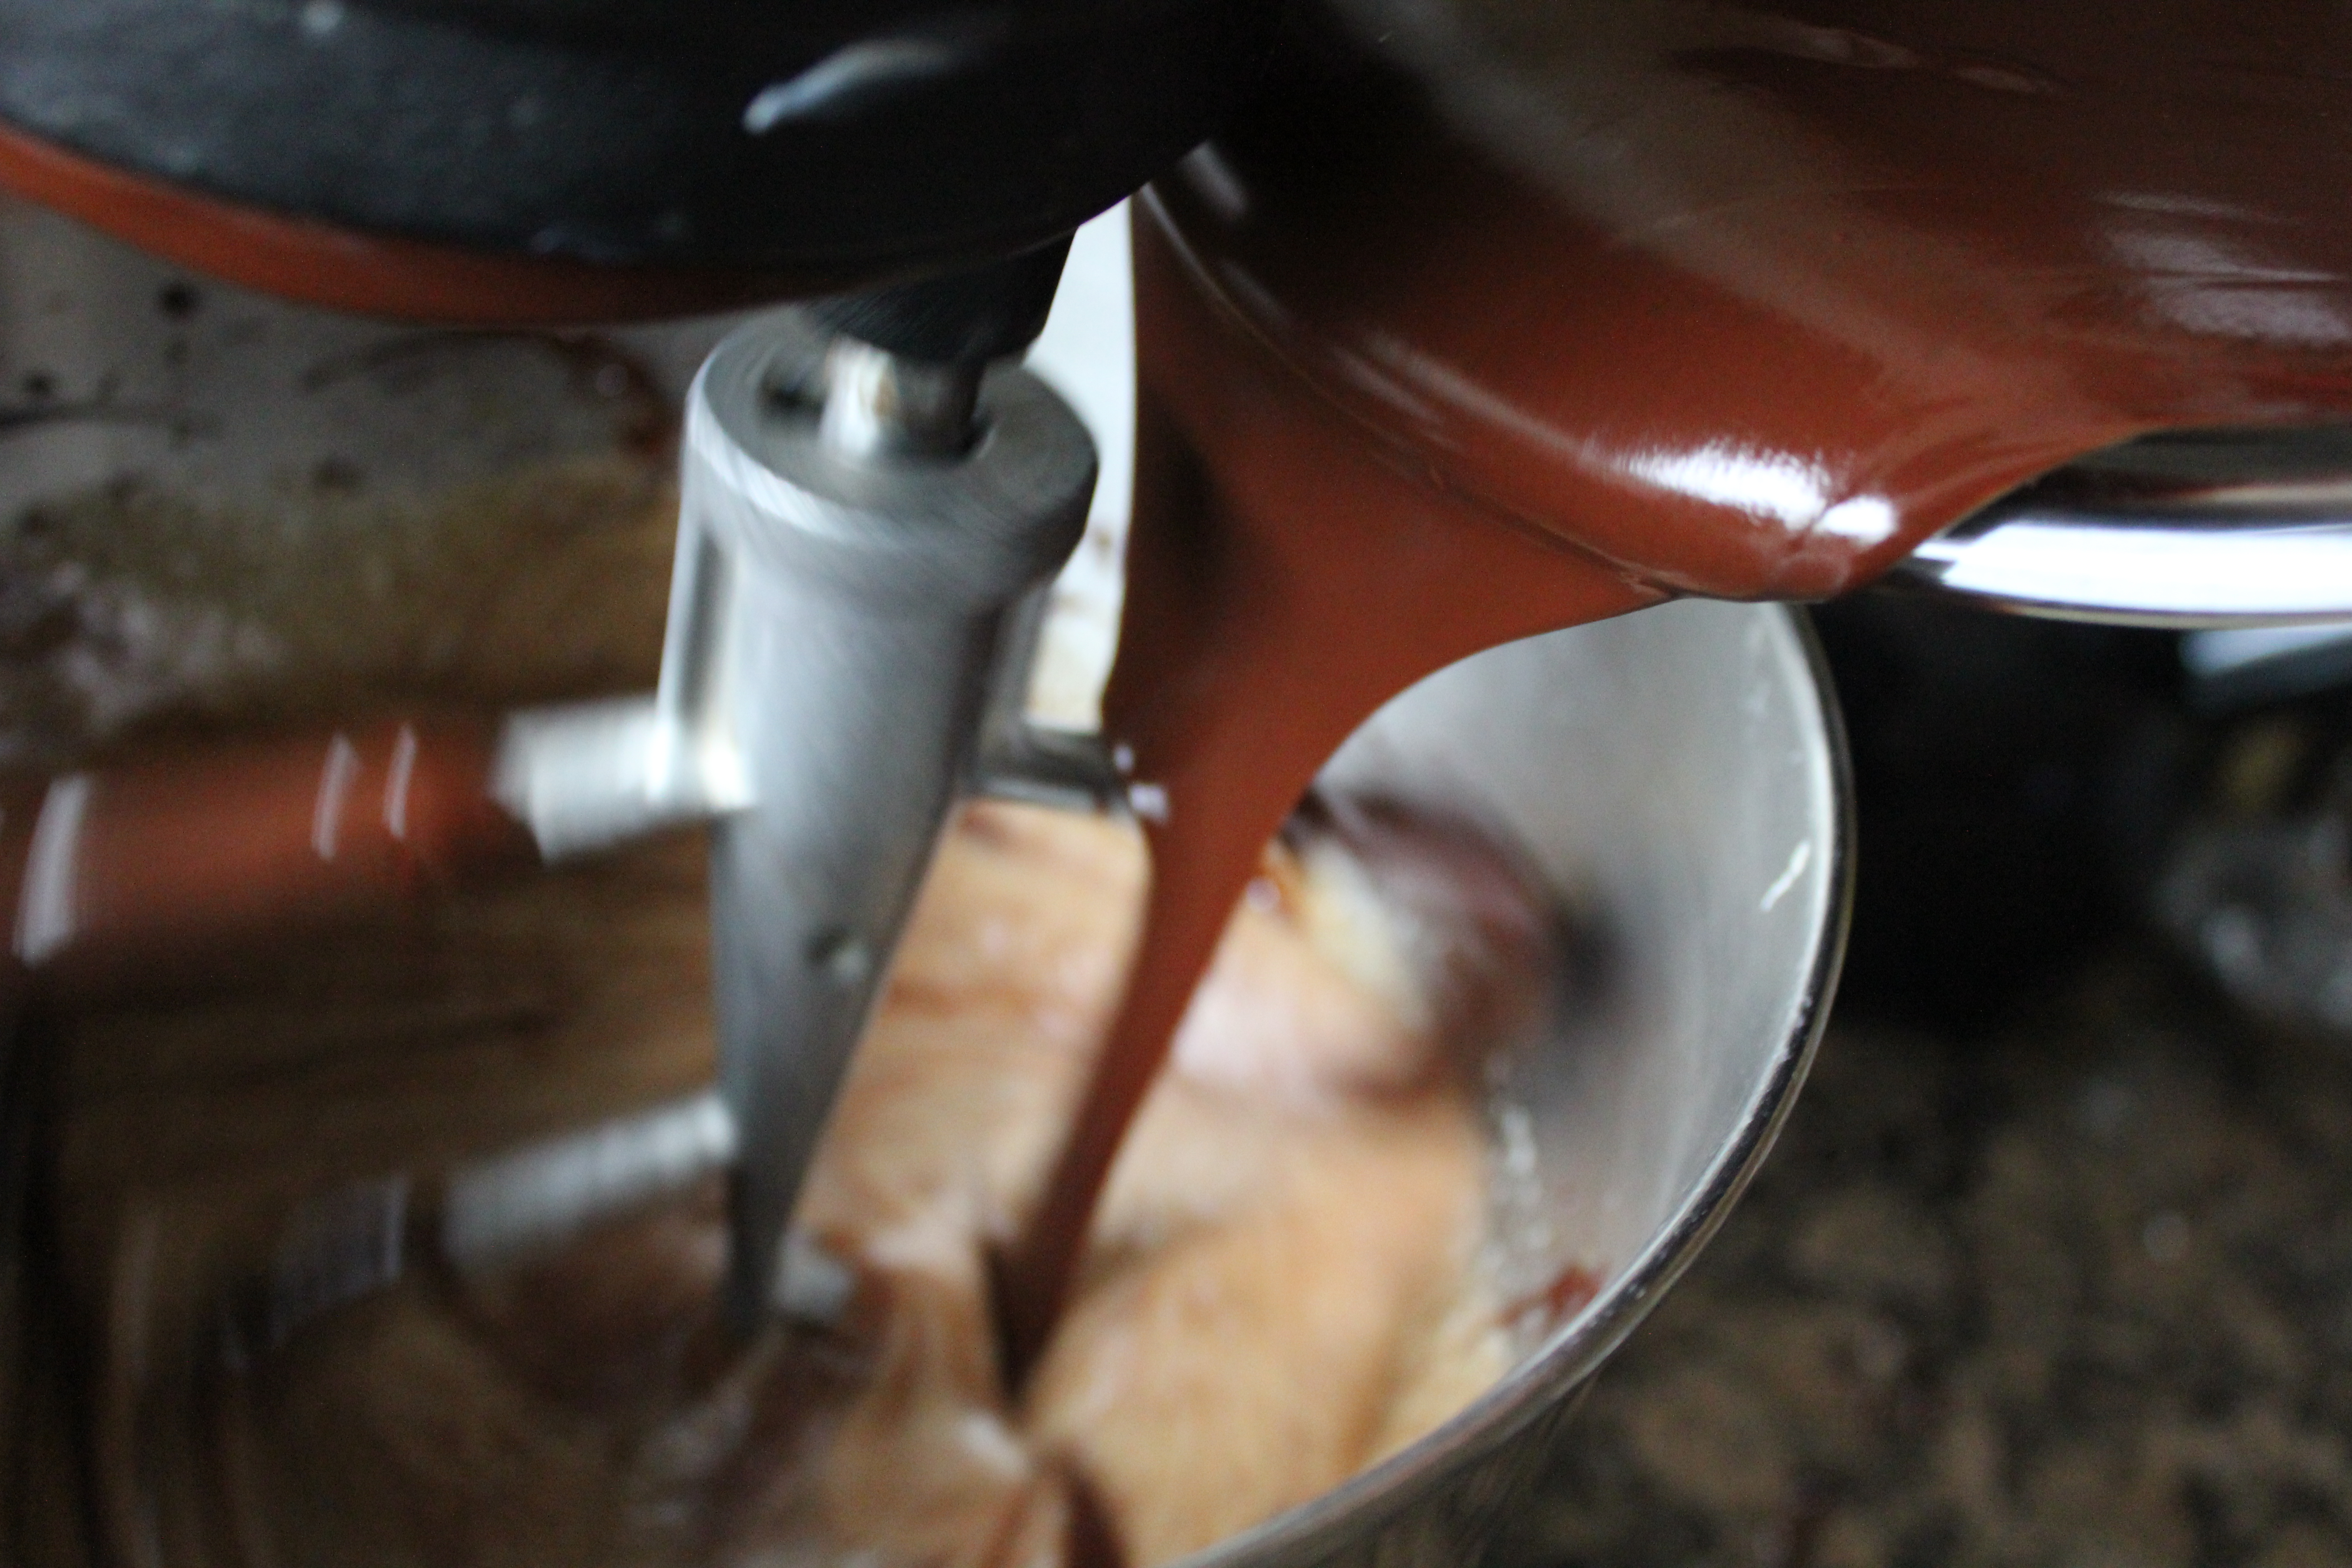
Firstly, we need to melt the chocolate and butter in a double boiler. Why the double boiler? It is because, chocolate can burn quite easy. Melting it in a double boiler assures that chocolate melts gently and no direct contact will heat will prevent the burning. For a homemade double boiler (also quite often referred to as water bath or bain marie), place a glass bowl on top of a saucepan containing water and then bring the water to a boil. Keep the water at a boil on medium heat during the entire process. When the butter and chocolate are well combined you will get a silky smooth look to the melted chocolate that looks like a ganache..
Set this aside, while we get the egg mixture ready. In a bowl of a stand mixer, add the 6 eggs, 1 tbs vanilla, 2 tbs of cooled espresso and the 1½ cup sugar. Beat until well combined.
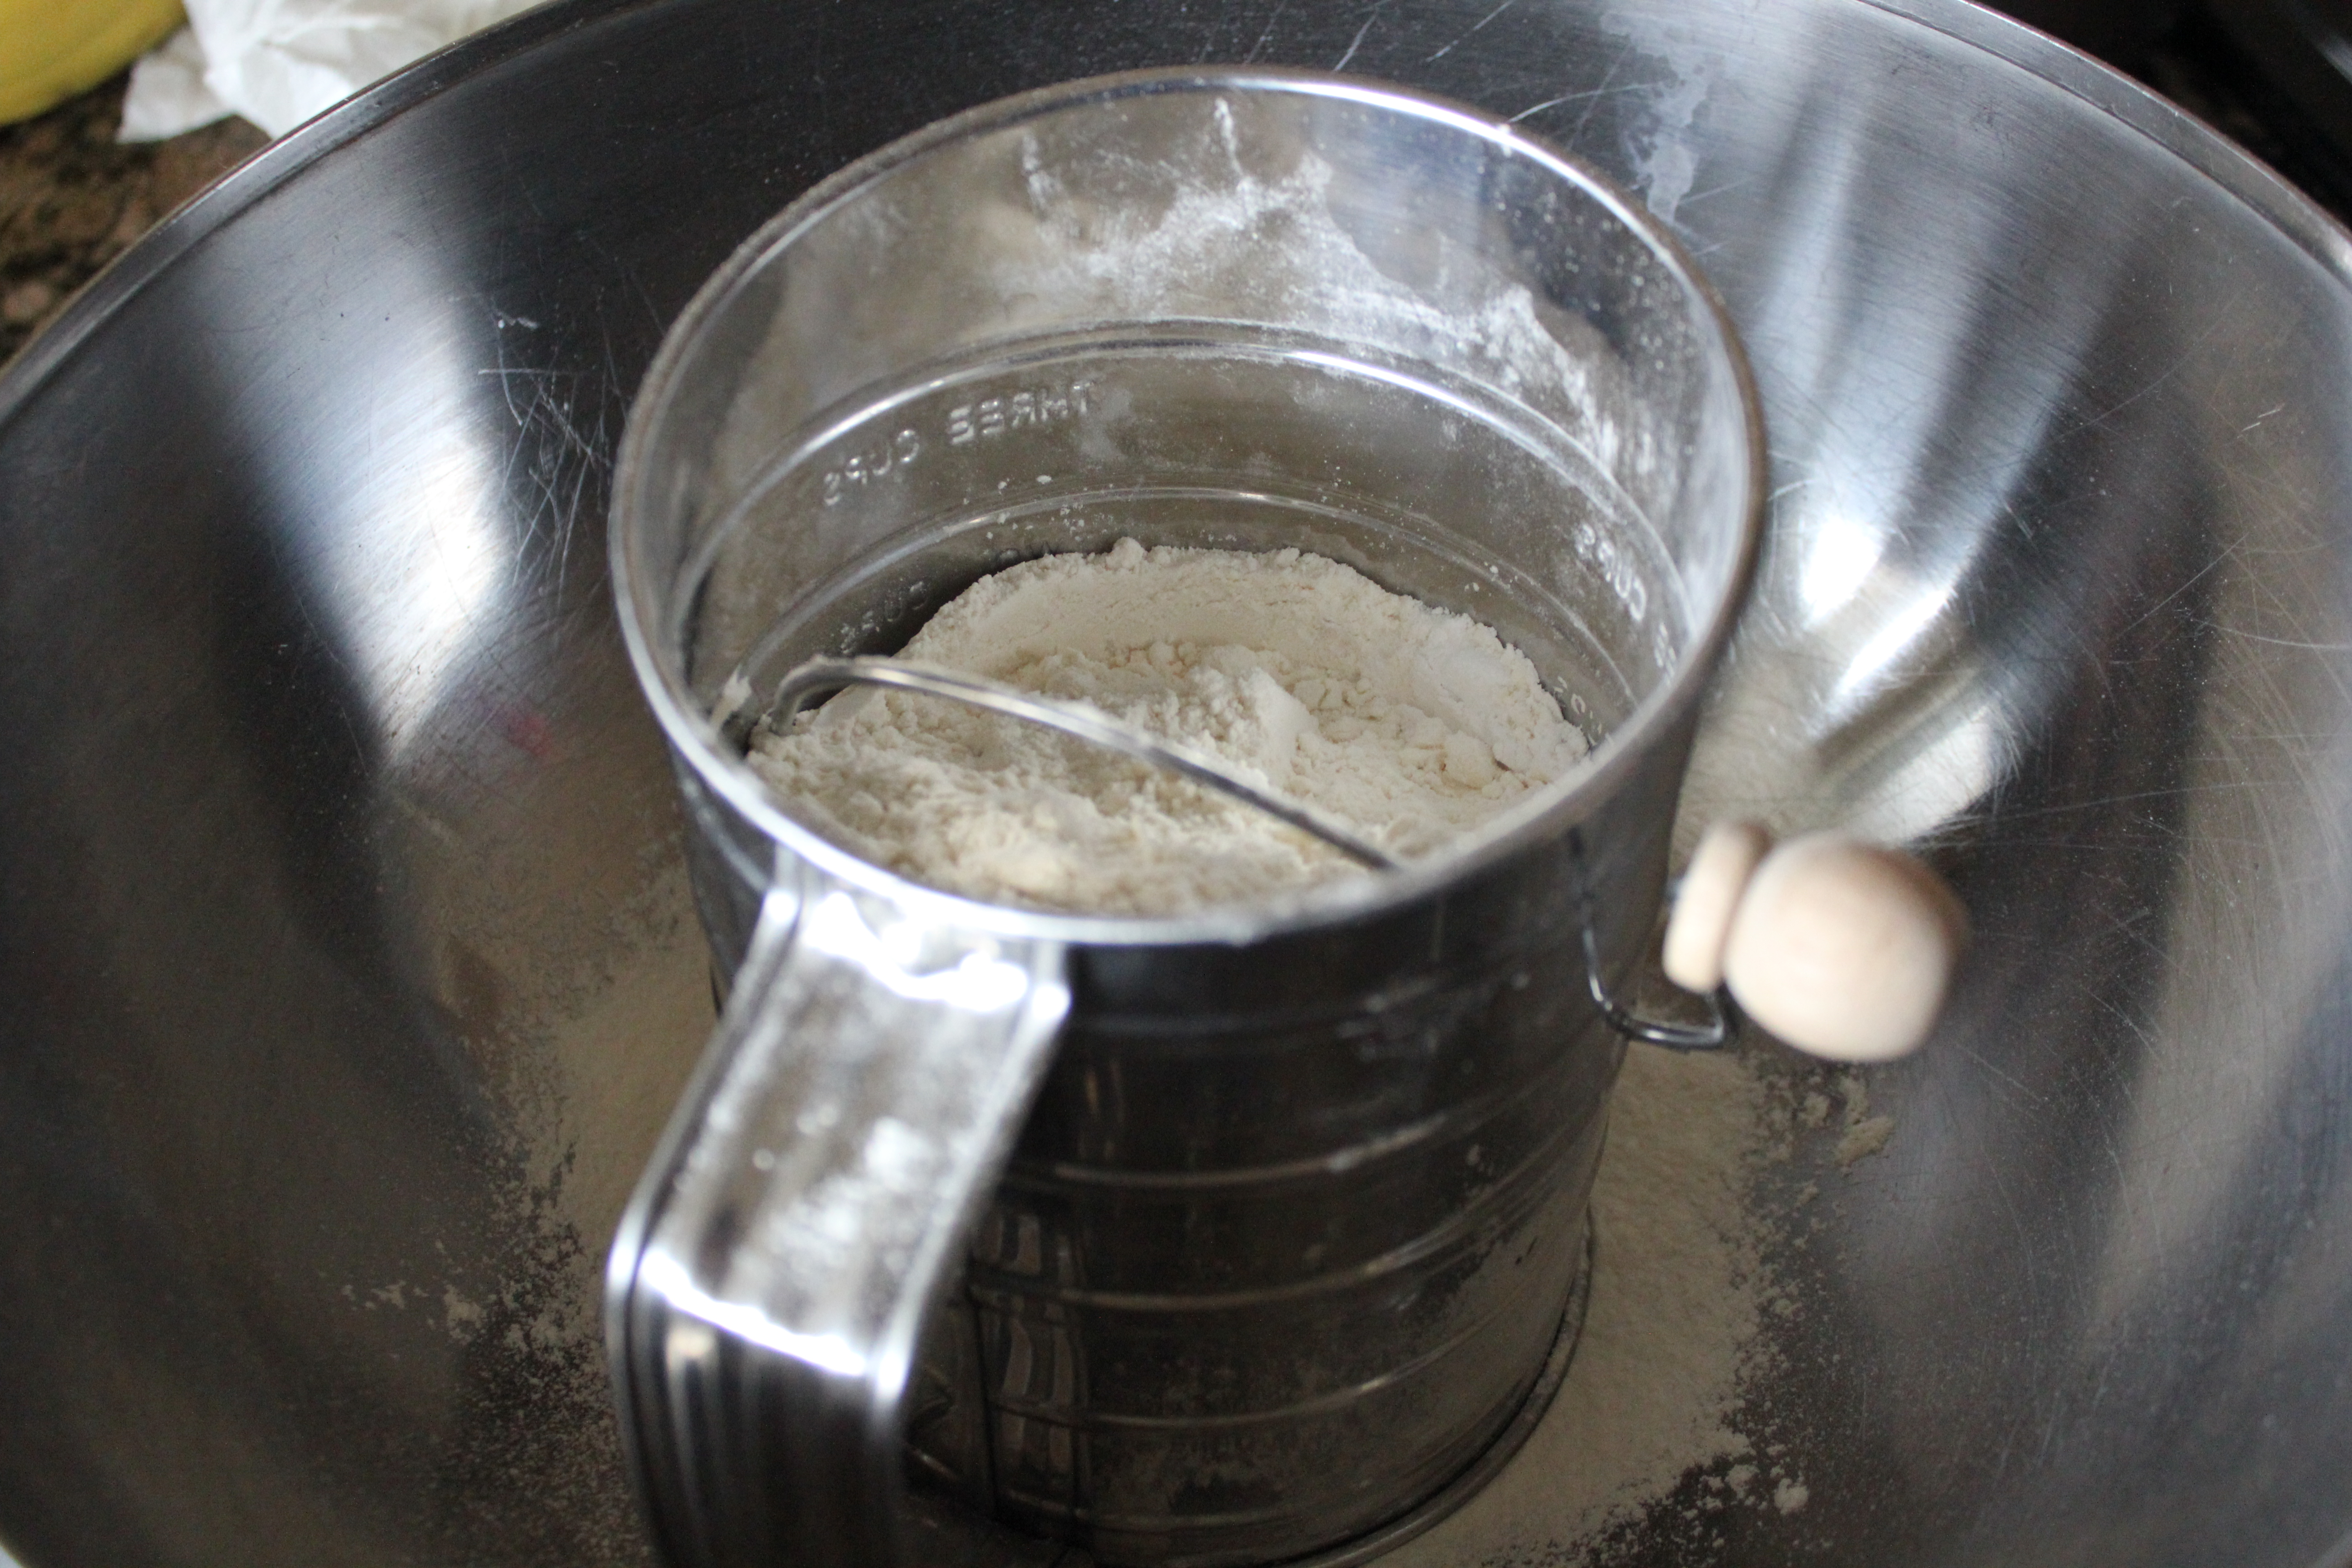
While the eggs are getting happy in the mixer, time to get the dry ingredients together. In a Sifter, sift the 1¼ all-purpose flour, the 1tbs baking powder and ½ tsp salt. If you don’t have a sifter, don’t sweat it, combine all the dry ingredients in a bowl and whisk away. The goal here with the sifting is to make sure your flour is well aerated before you bake. A balloon whisk should do the job as well.
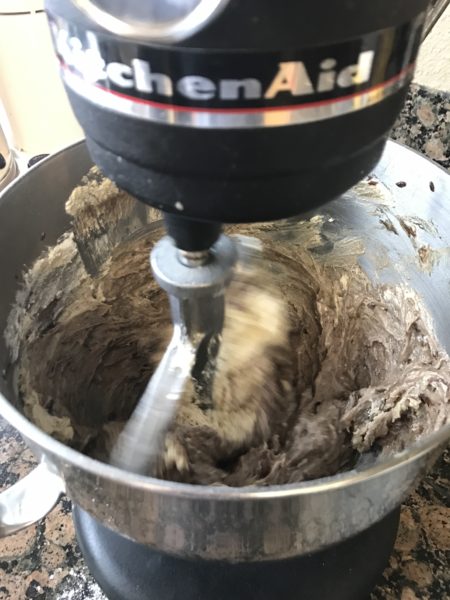
Once the eggs are combined, add the melted chocolate mixture into it and mix well. You can now add the dry ingredient ½ a cup at a time with the mixer running at a low speed. Here you want to mix just until the flour is incorporated into the chocolate egg mix.
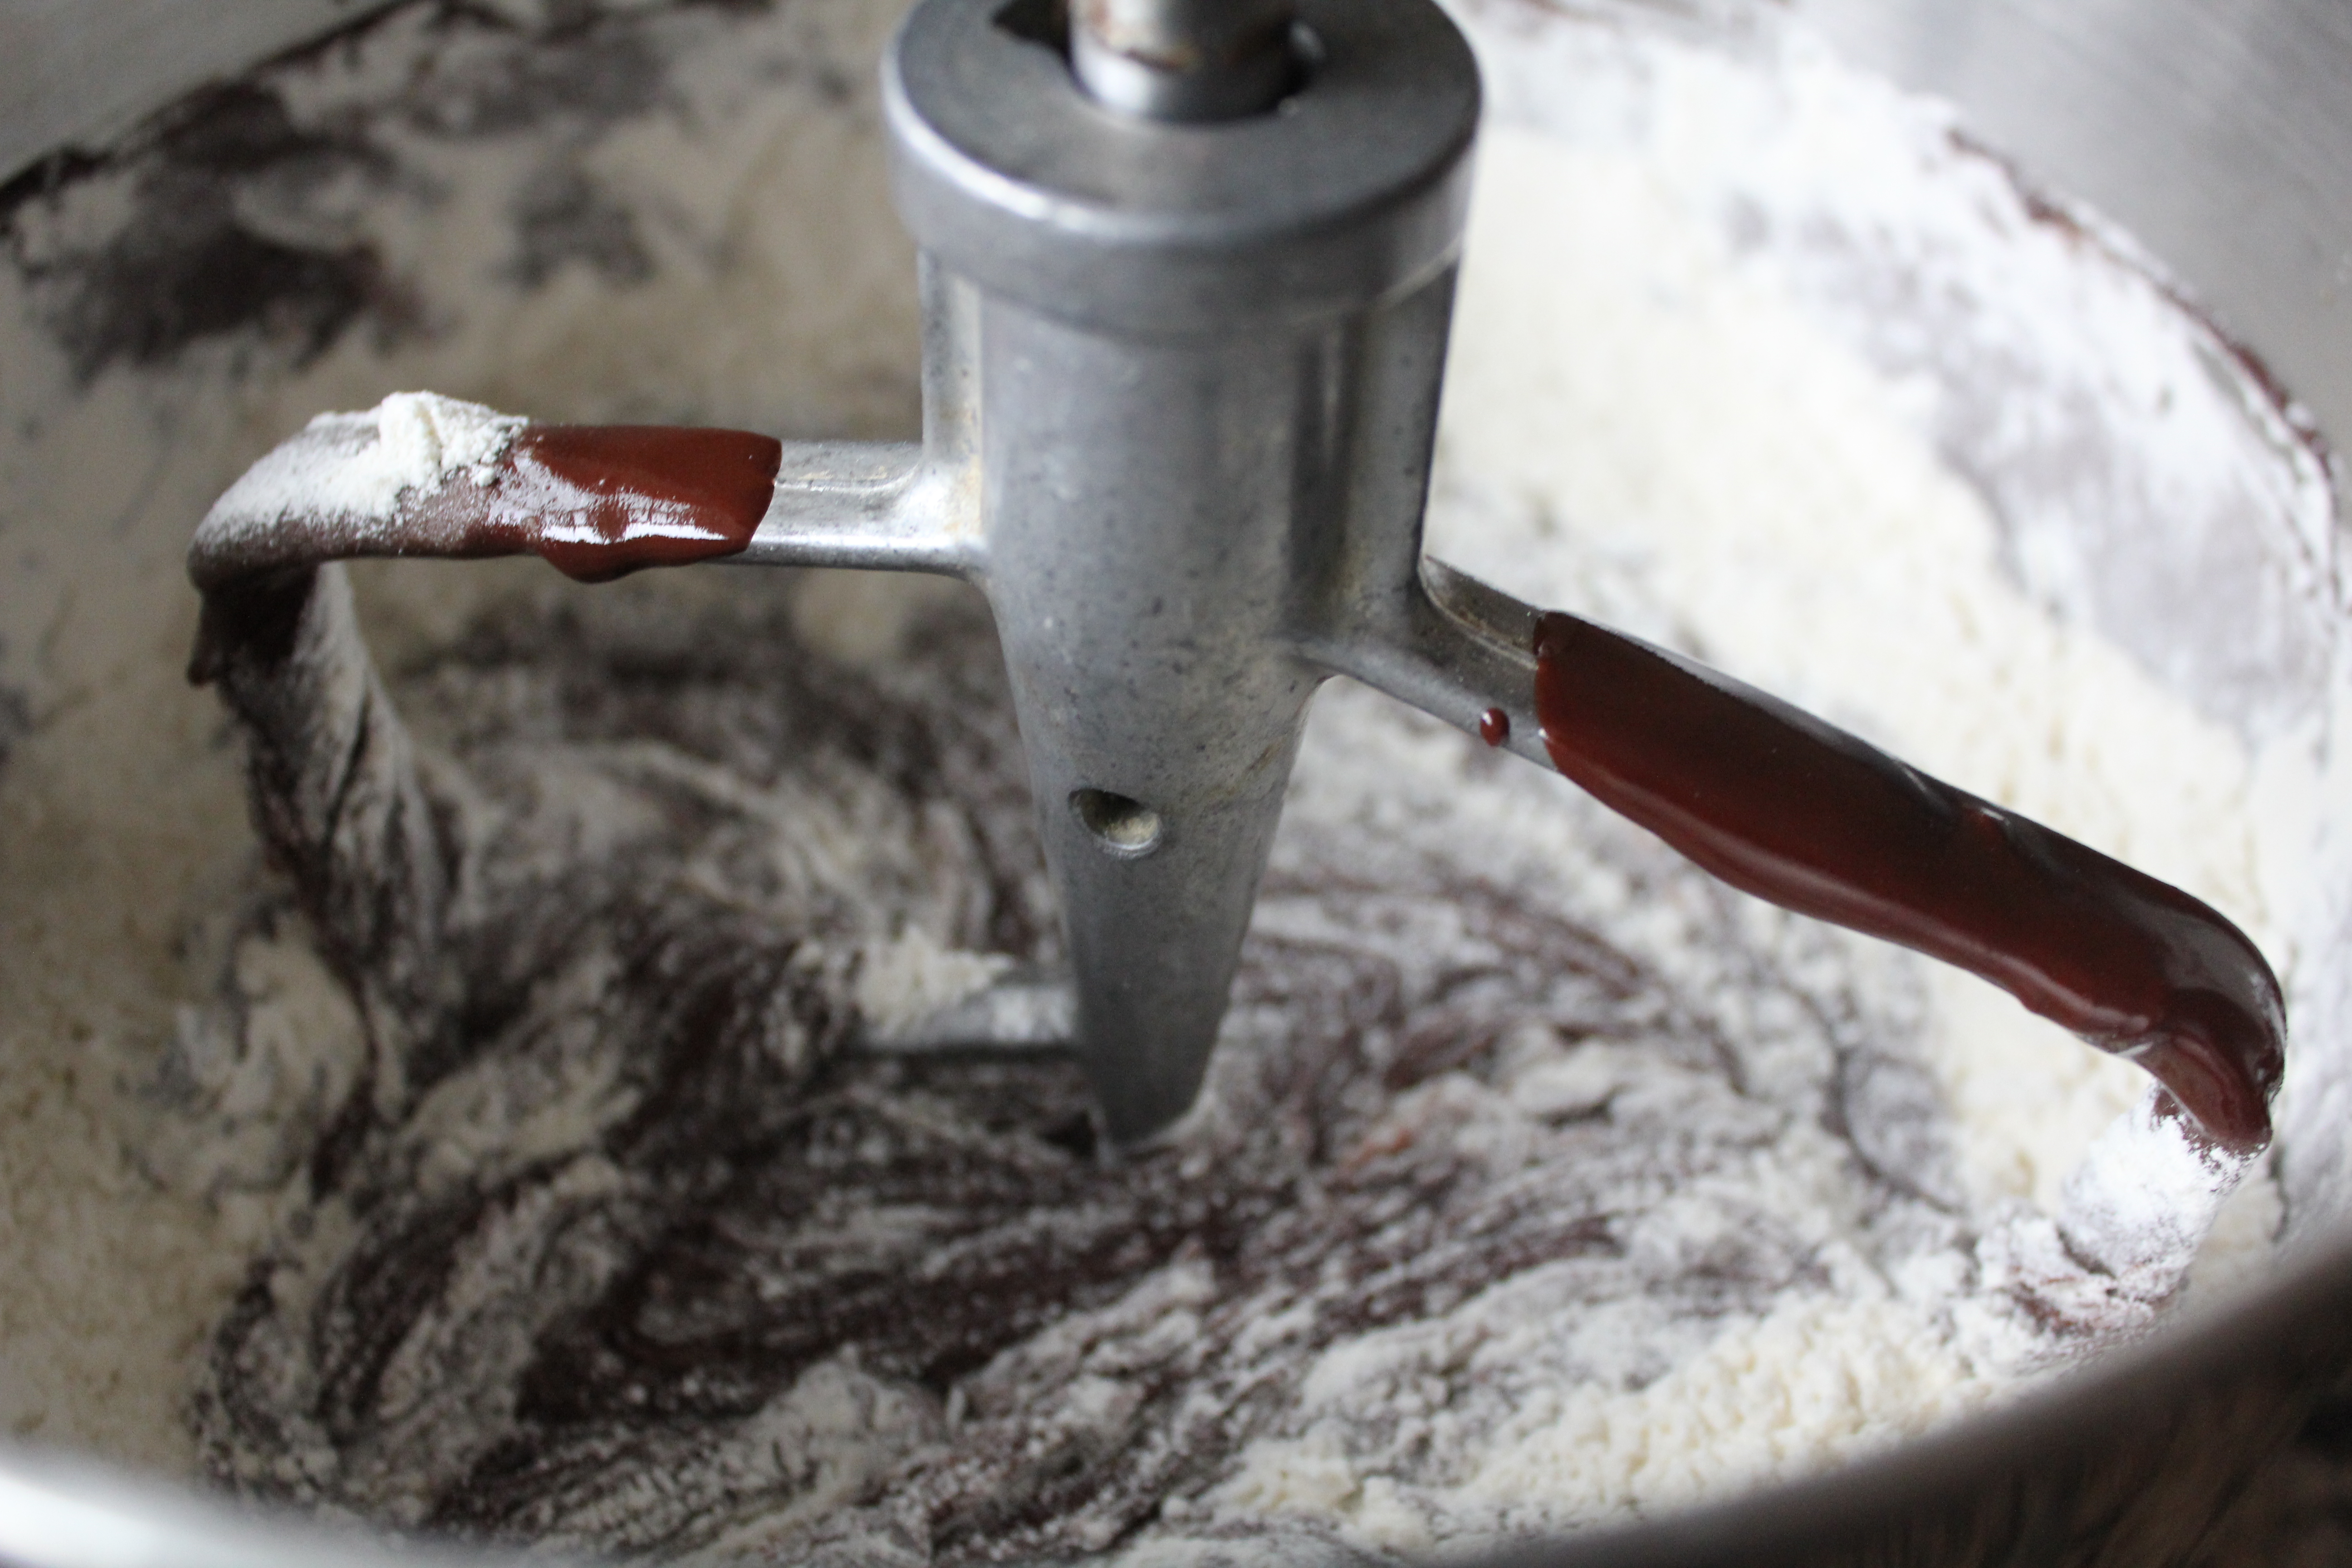
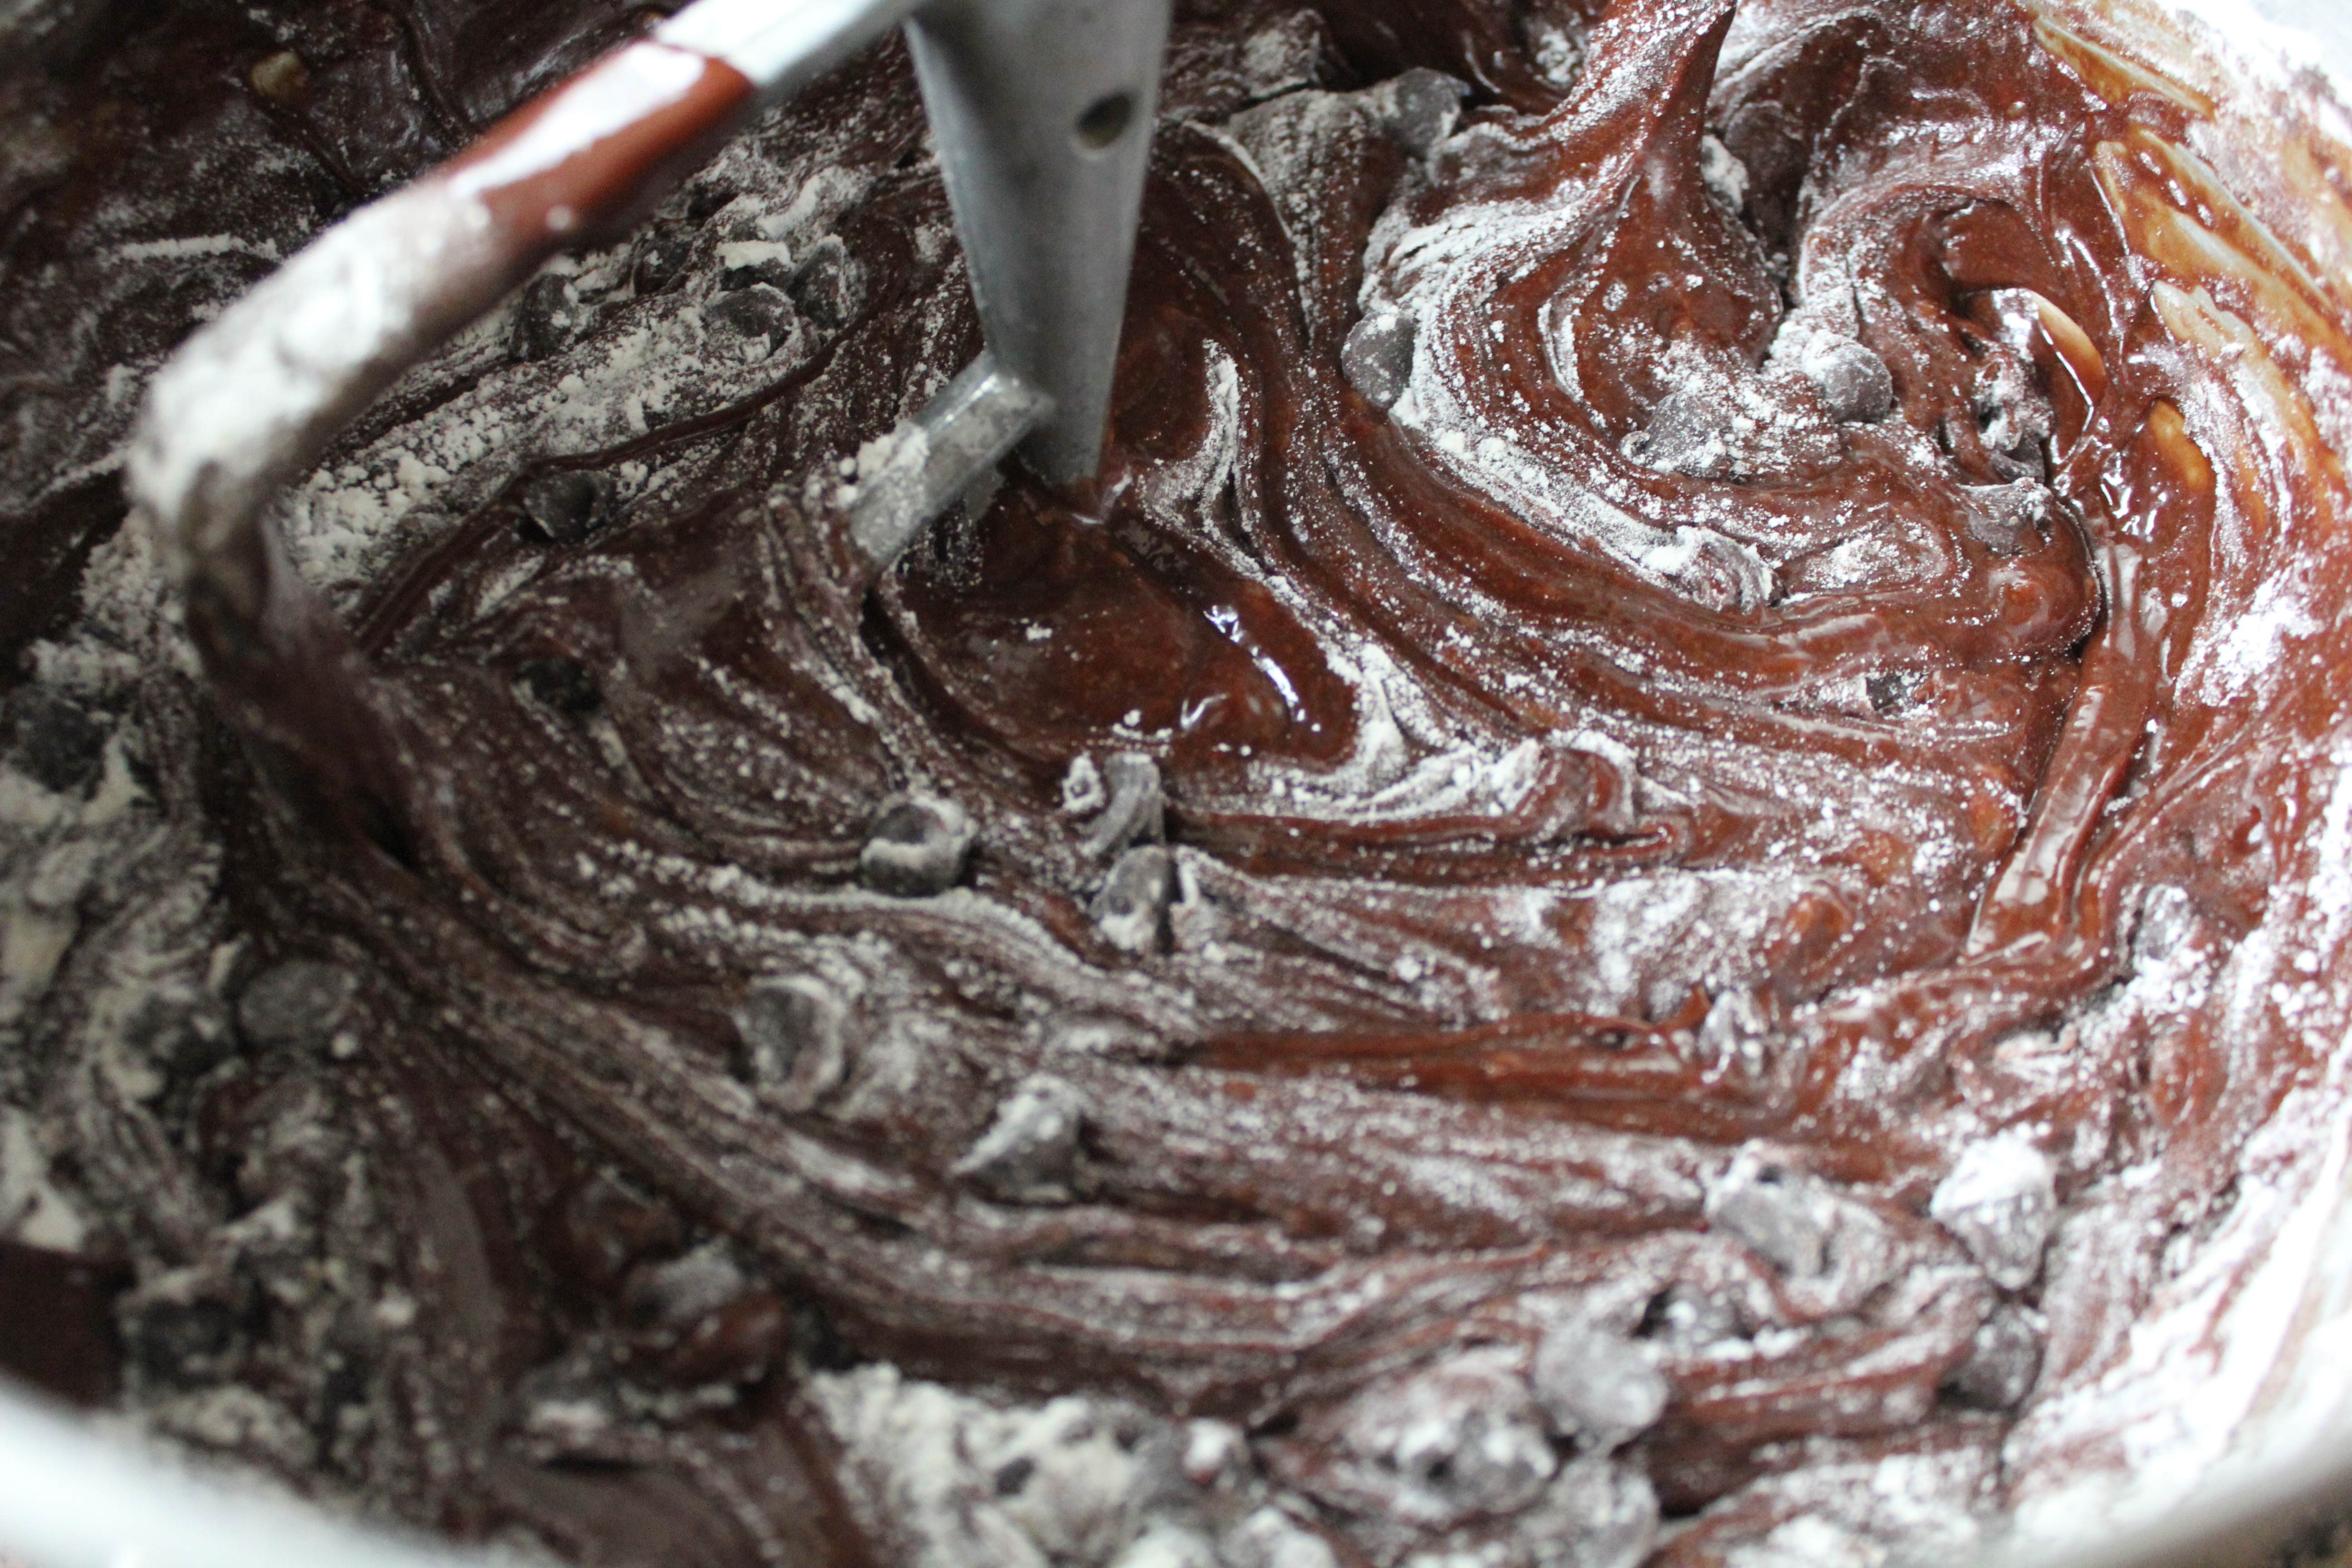
In a bowl mix about ½ to 1 cup of the extra dark chocolate chip with 2 tbs of flour. Add it to the chocolate mix and fold it in or if using a mixer just a few rounds should do..Coating the chocolate chips in flour will prevent all the chocolate chips from sinking to the bottom of the pan, they will remain floating in brownie through the baking process.
Bake the brownies at 350 for about 30 mins. Tapping the baking sheet a few time while baking will let the air out to get a more dense brownie.Do not overbake, this is important, it will dry up the brownies. Check the brownie after about 25mins with a wooden skewer, as soon as it come out clean, time to take it out.
If you do like chewy fudgy brownies, here a trick..While brownies are cooking, time to clean out the freezer, why? What has the freezer to do with my brownies you say? Well, this is to make some room for the baking sheet in the freezer. Once the brownies are done, take them straight from the oven to the freezer to cool. The concept is quite simple, when you boil veggies, as soon as it’s done, it’s dunked in ice water to stop further cooking. The brownies do the same, if you let it sit at room temp, it will continue to cook inside leading to some cakiness. If you desire the chewy fudgy brownie, then we want to cool it as fast as possible.
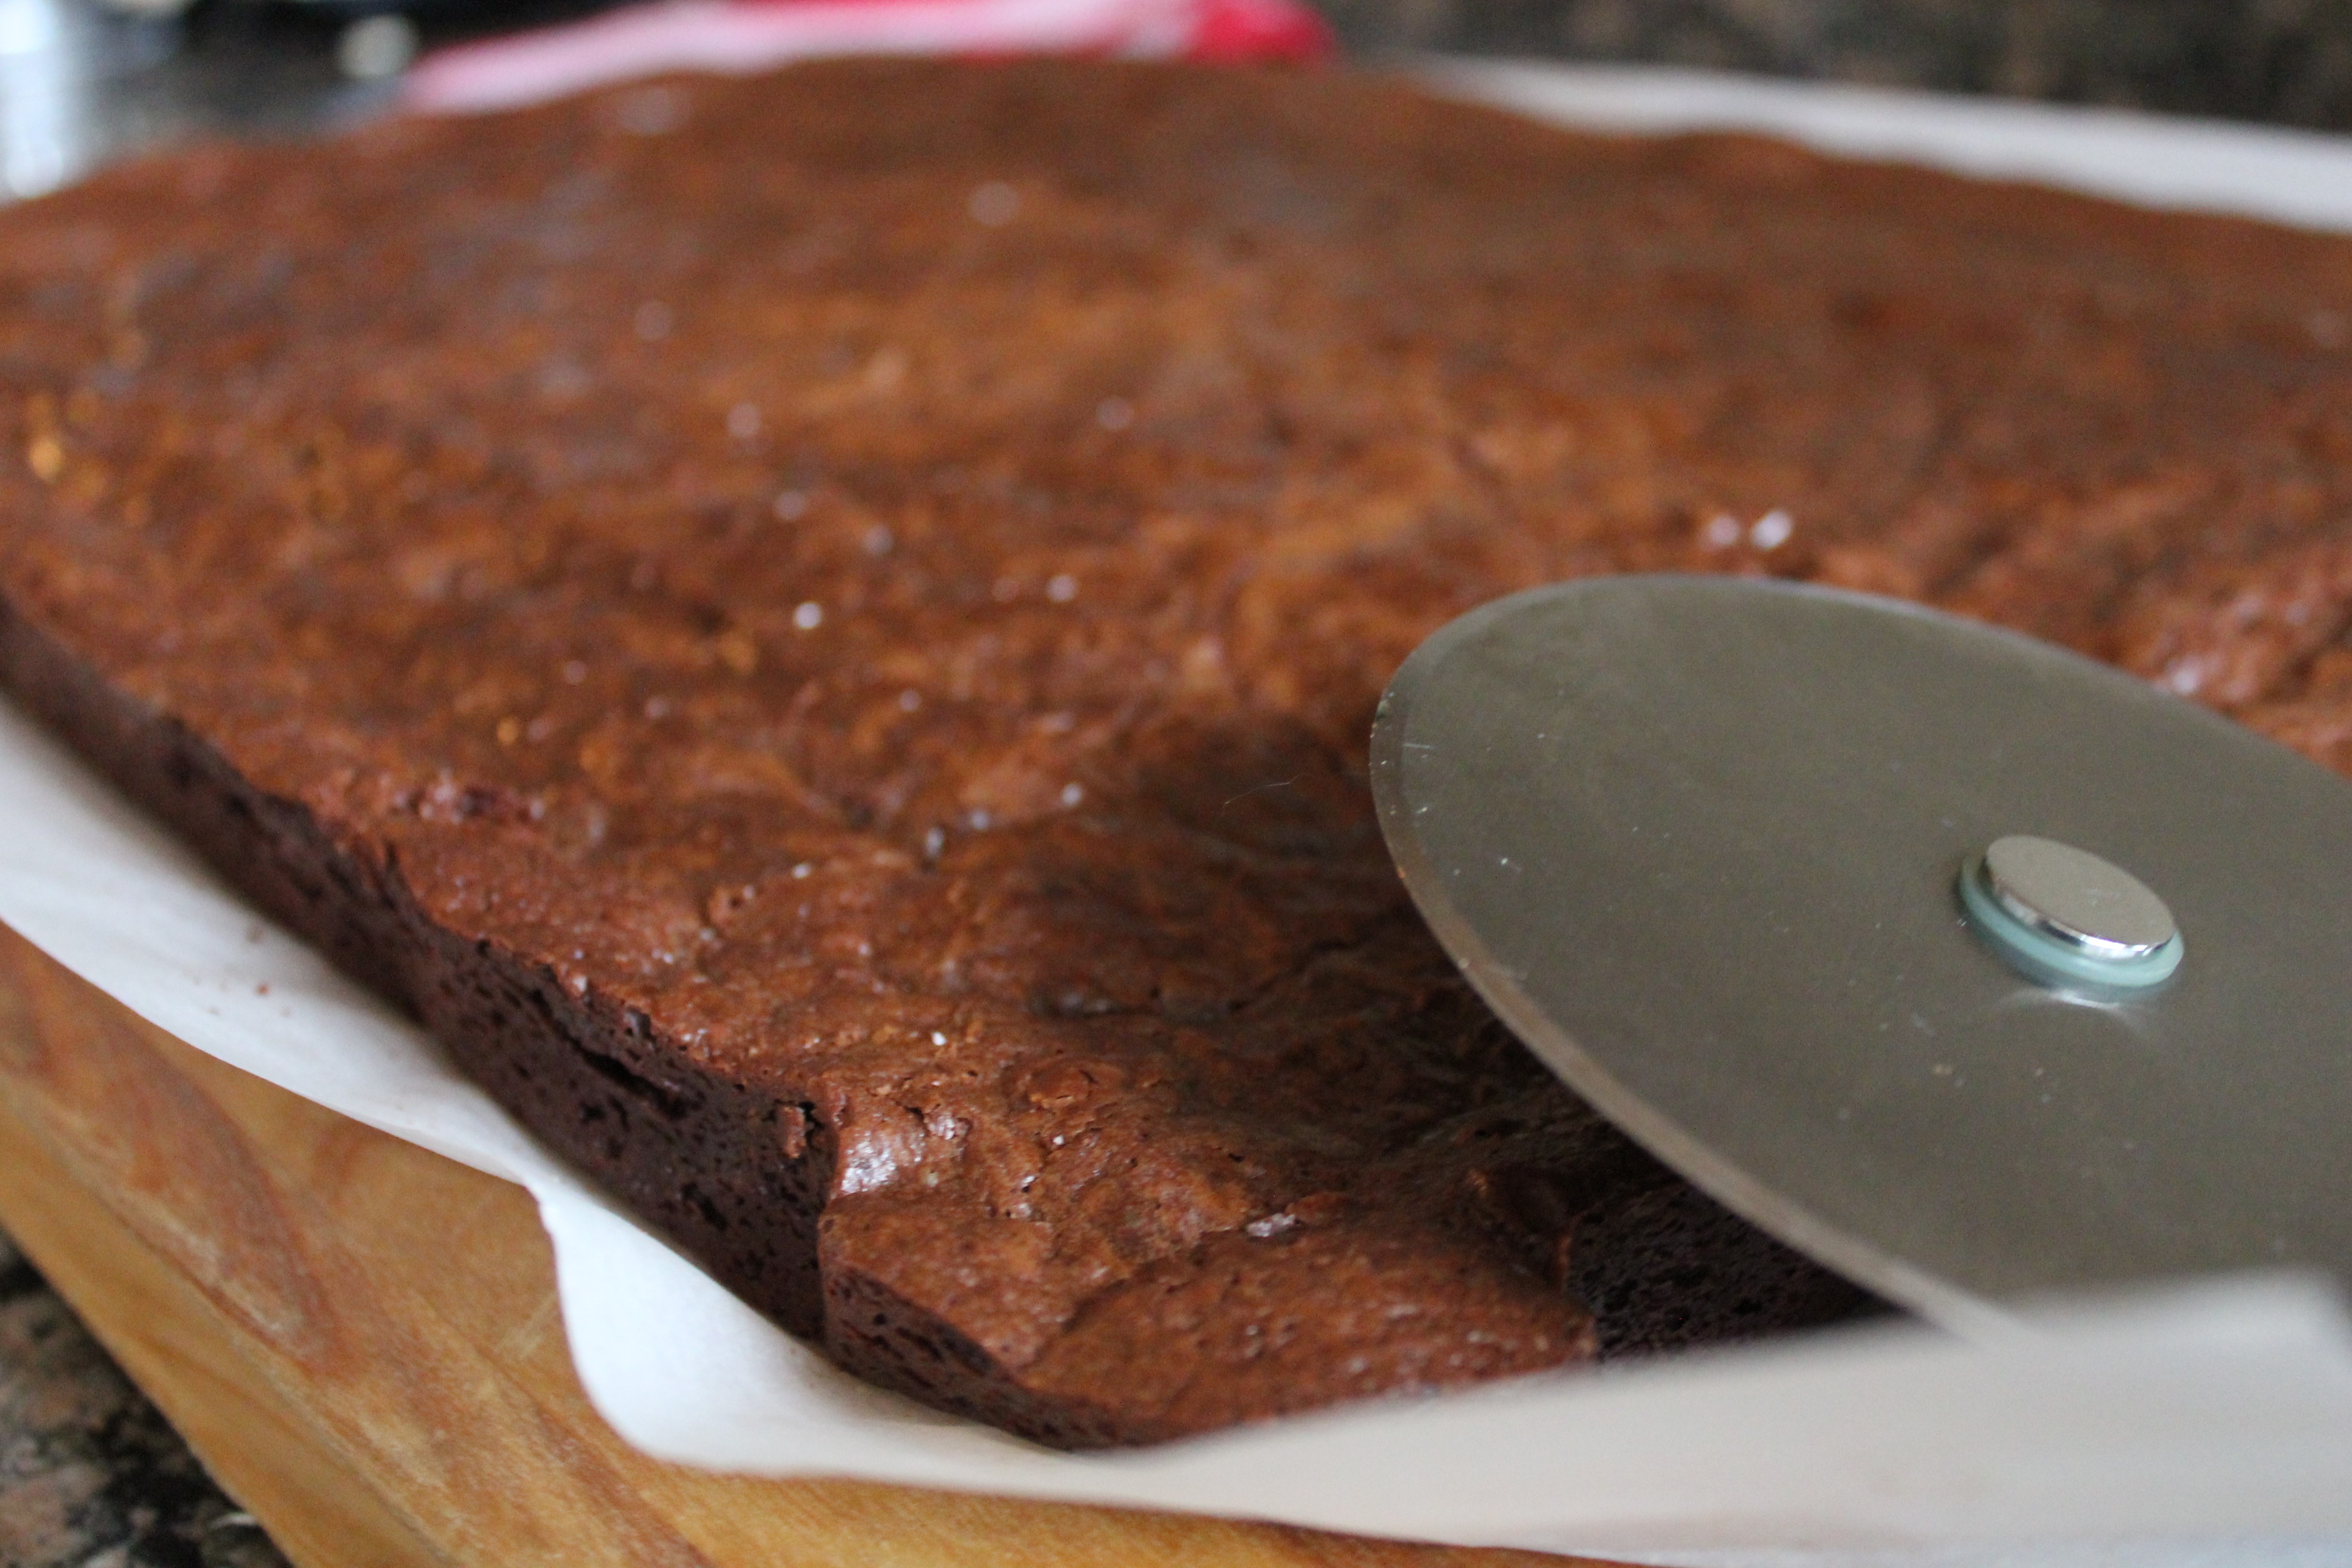
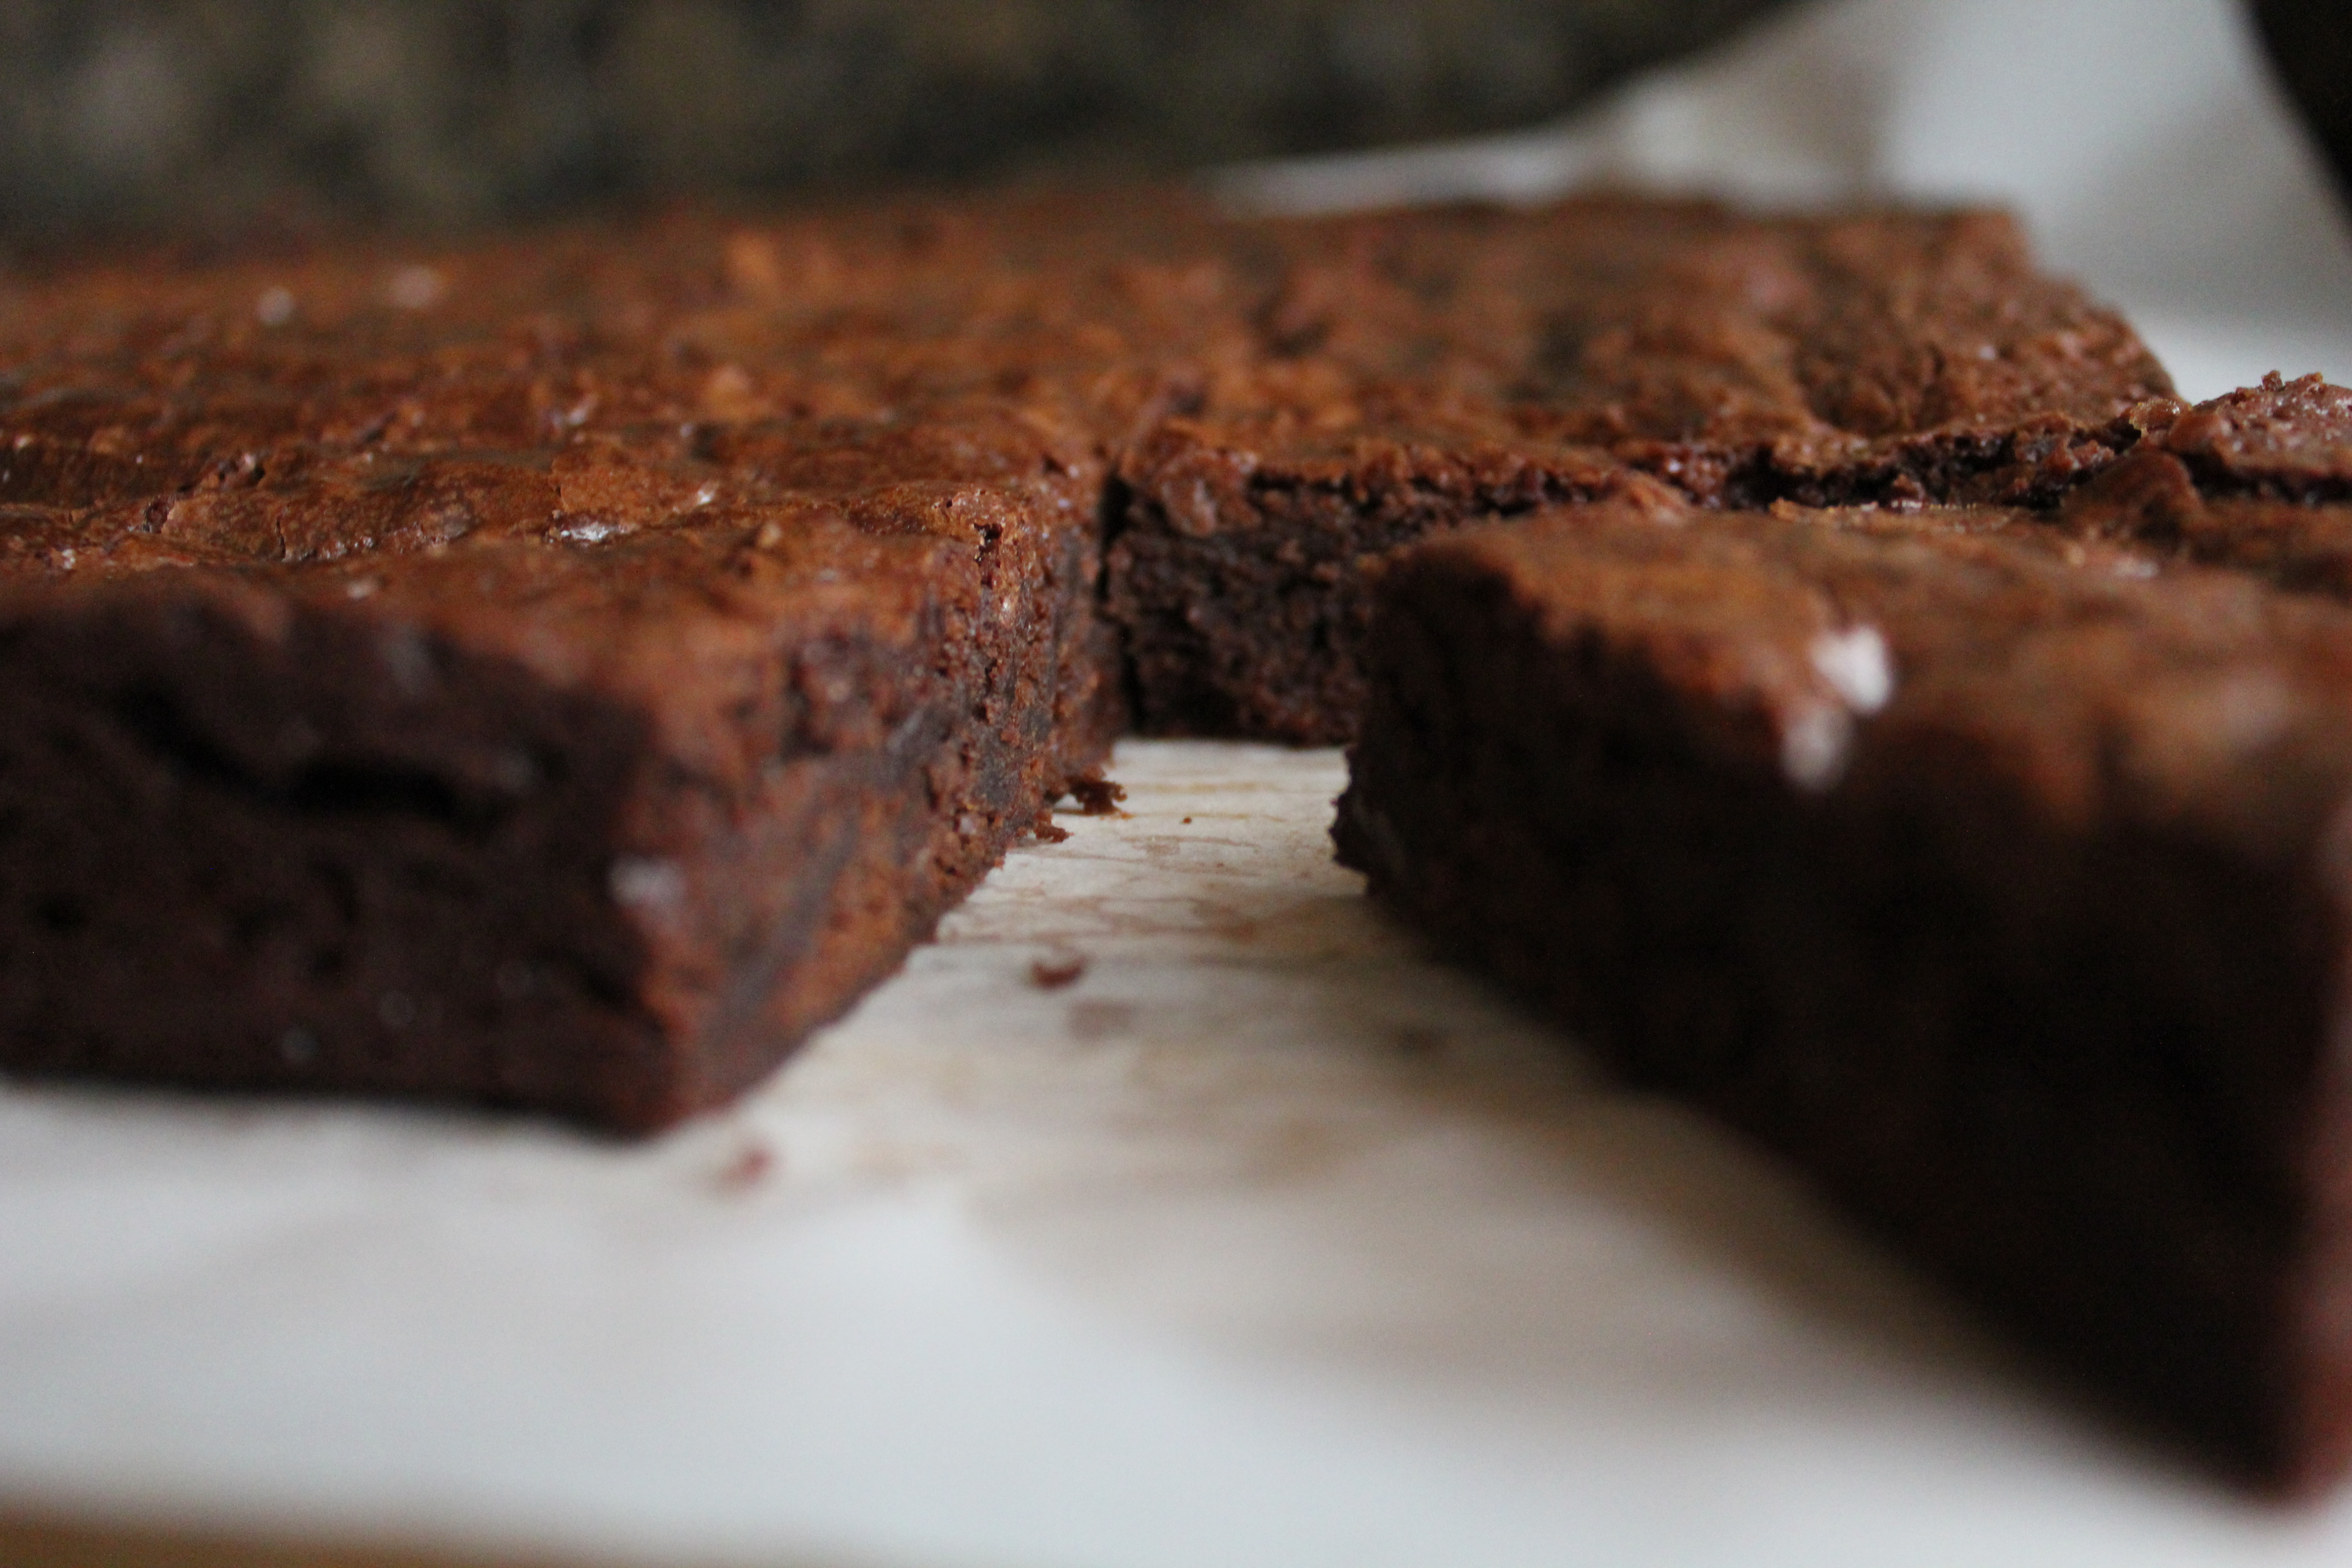
Cut the brownies after cooling it well.. If you cut it while still warm, it will crumble up. I like to use my trusty pizza slicer for cutting up the brownie but a large sharp knife will do the job well as well. Brownies usually takes better the next day after you bake, the chocolate sets up well resulting in further goodness.
How do you best like your brownies? Leave me a comment! For me it just has to be slightly warmed up with a big scoop of vanilla bean gelato (my favorite brand Talenti), gently melting away on top of that warm brownie.
Dark Chocolate Brownies
Prep time
Cook time
Total time
Recipe type: Dessert
Serves: 24
Ingredients
- 3 Sticks of Butter
- 11.5oz Semisweet Chocolate Chips (Guittard Chocolate Chips preferred)
- 11.5oz + 1 cup Extra Dark Chocolate Chips (Guittard Chocolate Chips preferred)
- 6 Eggs
- 1 Tbsp Vanilla Extract
- 2 Tbsp Espresso
- 1½ cups Sugar
- 1¼ cup All Purpose Flour
- 1 Tbsp Baking Powder
- ½ Tsp salt
Instructions
- Preheat oven to 350F
- Line 12 x 18 x 1-inch baking sheet with parchment and grease with butter.
- Add the 3 cups of butter in a glass bowl to place on top of a double boiler.
- Once the butter starts to melt, add all the chocolate chips to the bowl
- Using a spatula, stir the butter and chocolate chips until the chocolate chips melt
- Set the melted chocolate on the side to cool.
- In a mixer, mix the 6 eggs, the 1Tbsp vanilla extract, 2 Tbsp of coffee and the 1½ cups of sugar.
- In a sifter, sift the the 1¼ cup of All Purpose Flour, 1 Tbsp Baking Powder and the ½ Tsp salt.
- Toss the 1 cup of extra dark chocolate chips with 2 Tbsp of flour and set aside
- Once the egg is well mixed, add melted chocolate and mix well.
- Then add the flour mixture and mix until just combined.
- Lastly add the 1 cup of chocolate chips tossed in flour to the mix. Fold it in with a spatula or mix just enough to incorporate into the mix
- Pour the entire chocolate mix into a baking sheet lined with parchment
- Bake at 350F for 30 to 35 min until a toothpick inserted comes out clean.
- Tapping the baking sheet a few time while baking will let the air out to get a more dense brownie.
- Put the baking sheet into the freezer as it comes out of the oven for a hour or 2 to cool it down to get a more chewy texture in the brownie.
- Cut to desired size squares and enjoy!
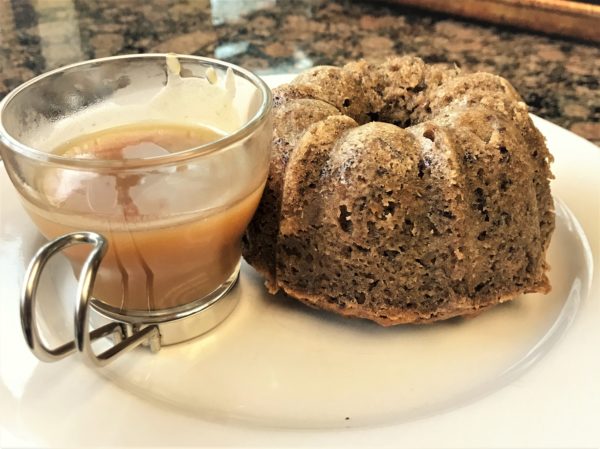
Sticky Toffee Pudding Cake with Caramel Sauce
There’s something about “Sticky” and “Toffee” that got my attention over the holidays. Let me tell you and it does taste exactly like what it sounds and is a perfect dessert to serve up on a cold winter evening.
The cake’s origin takes you over to the northwest country side of England. The story is that it was first created in the 1970s during the winter months in the Lake District where it can get really cold. It was served warm, drizzled with a warm toffee sauce. It slowly became a popular comfort food throughout England. It is now served as a classic holiday dessert in England. It is also a popular dessert in Australia and New Zealand.
Although called a pudding, it is really a very moist cake made with dates and drenched in the buttery toffee sauce.
What I like about it is it is a foolproof moist cake. The secret is to keeping this cake moist is using a water bath while baking the cake.
Tips & Tricks:
1. Key to getting the cake to a sticky pudding feel is to soak the dates in boiling water and baking soda until they just simply fall apart on touch.
2. Use a water bath while baking the cake, this will give you a moist and spongy texture that make the cake just melt in your mouth.
I have it broken down in to the following easy steps for you to follow along..
PART 1- THE CAKE
Ingredients:
2 Cups Chopped Dates (Medjool preferred)
1 Cup Water
1/2Tsp Orange Zest (optional)
1Tsp Vanilla Extract
1Tsp Baking Soda
1.5 Cups Unbleached All Purpose Flour
1Tsp Baking Powder
½Tsp Salt
1 Cup Butter (at room temperature)
½ Cup Dark Brown Sugar
½ Cup Granulated Sugar
2 large Eggs
Method:
Step 1:
2 Cups Chopped Dates (Medjool preferred)
1 Cup Water
1/2Tsp Orange Zest (optional)
1Tsp Vanilla Extract
1Tsp Baking Soda
1. Bring the 1 cup of water to boil.
2. Add the 2 cups of dates, 1 tsp Baking Powder, ½ Tsp Orange Zest(optional) if using to the boiling water.
3. Let soak until the dates fall apart at touch. Add the 1sp Vanilla Extract.
This is almost the single most important step for this cake. The trick to getting that gooey sticky pudding cake is soaking the dates in boiling water and baking soda until they just simply fall apart on touch.
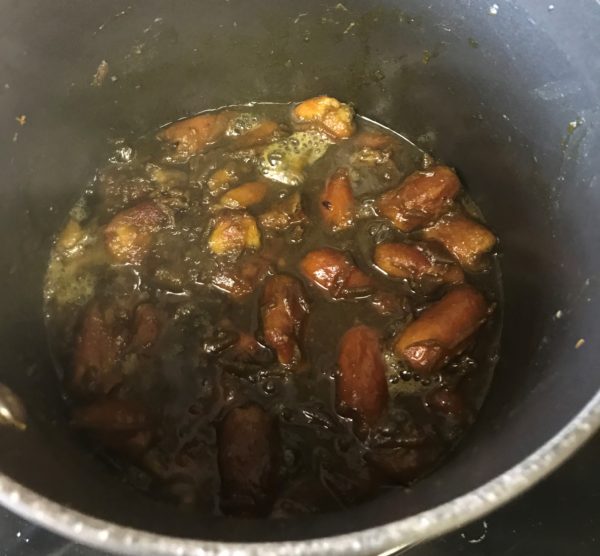
Soak dates in boiling water with baking soda
Step 2:
1.5 Cups Unbleached All Purpose Flour
1Tsp Baking Powder
½Tsp Salt
1. Sift 1.5 cups Unbleached All Purpose Flour, 1 tsp Baking Powder and ½ Tsp Salt. Set aside.
Step 3:
1 Cup Butter (at room temperature)
½ Cup Dark Brown Sugar
½ Cup Granulated Sugar
2 large Eggs
1. In a Mixer, mix together 1 cup Butter (at room temperature), ½ cup Dark Brown Sugar and ½ cup Granulated Sugar
2.When well mixed, add 2 large eggs and mix.
Step 4:
1.Add the date mixture to the wet ingredients in the mixture and mix until all the dates are incorporated
2. Add the sifted flour mix and mix until combined. Set aside.
Step 5:
1.Preheat oven to 325F
2. Bring water to a boil in a kettle
3. In the meantime, grease Mini Bundt cake tray with some butter or Pam and coat lightly with flour. You could also use Ramekins or a Muffin Tray.
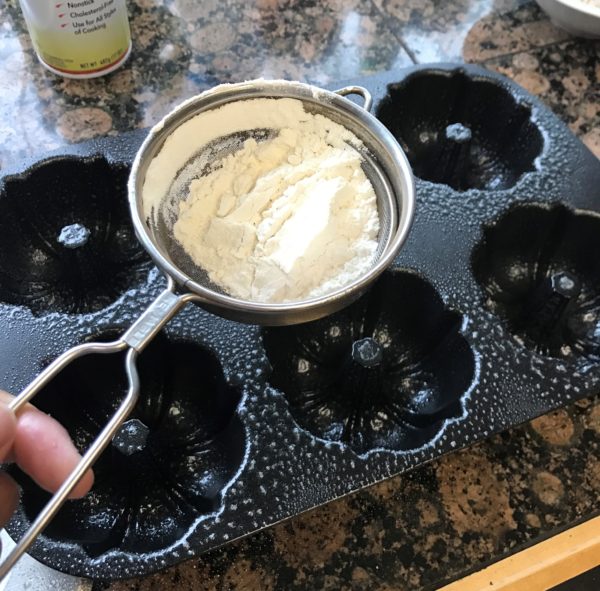
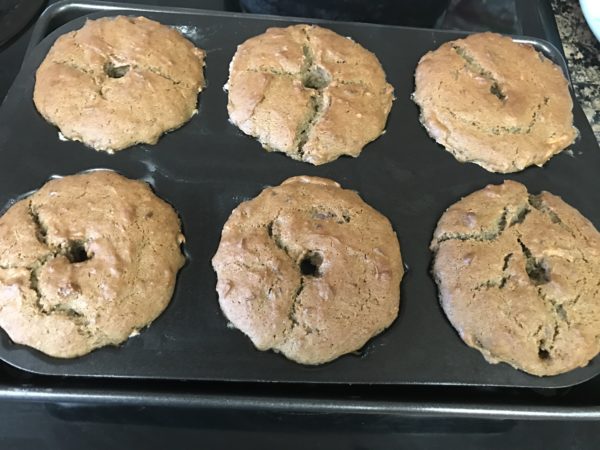
4. Pour the cake batter into the Mini Bundt tray.
5. Lightly Sprinkle some granulated sugar on top. This is give a slightly crispy base when the cakes are done
6. Place the Mini Bundt tray or Ramekins into a 9×13 inch baking pan, then place in the oven.
7. Once in the baking rack, carefully pour the boiling water around the bottom of the tray. The boiling water should come up to at least half the height of the Mini Bundt tray or the Ramekins.
8. Bake for 35 to 40 mins until a skewer inserted into the cake comes out clean.
9. Carefully take the Mini Bundt Tray or Ramekins out of the oven. Keep in mind, at this time, the water bath around the Mini Bundt Tray or Ramekins is really hot.
10. Let cool for an hour…
PART 2 – THE CARAMEL SAUCE
Ingredients:
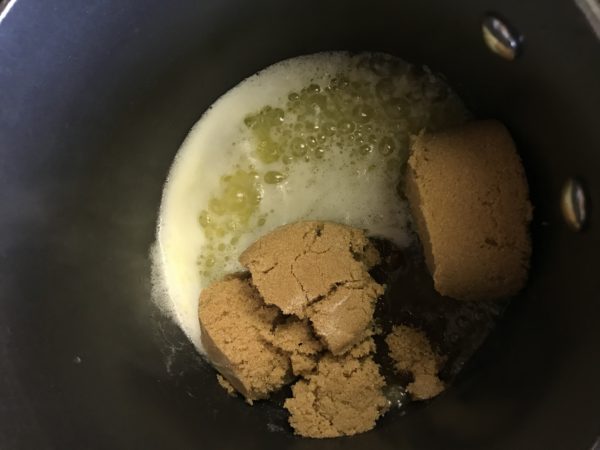
1.5 Cups Butter
1 Cup Light Brown Sugar
¼ Tsp Sea Salt
1Tbs Cointreau or Bourbon (Optional)
1 Cup Whipping Cream
½Tsp Vanilla Extract
Method:
1. On medium high, heat 5cups of Butter and 1cup Light Brown Sugar in a saucepan until the butter and brown sugar start to boil. Bring the heat to low, and let the mixture simmer until the brown sugar well combined with the butter. This would take about 5-6 mins.
2. Add the ½ Tsp Vanilla, ¼ Tsp Sea Salt and 1Tbs Cointreau or Bourbon if using and simmer addition 2-3 mins.
3. Add the 1cup Whipping Cream and heat until sauce starts to look more like a caramel, about 4-5 mins.
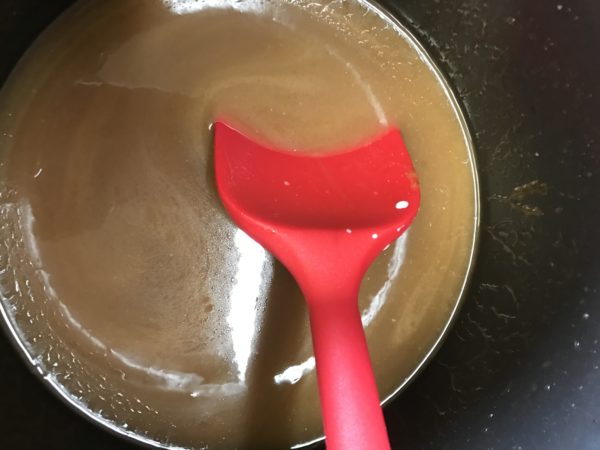
4. Take off the heat and it is ready to serve with the cake…You other option is to grab a spoon and just got for it :)@